 |
|
 01-05-2021, 05:41 PM
|
#882 | |
|
Tri-State Post Whore
|
Quote:
I ordered a pretty cool Dbilas intake system from the motherland that is on its way to replace my hot air intake. I have to make a bracket for that and hopefully find a good place to mount my cruise control and relays, and the engine bay will be tidied up pretty well. Here's a shot with most of my refinished stuff on.  Untitled by Bobbie Morrone, on Flickr Untitled by Bobbie Morrone, on Flickr
|
|

|

|
|
01-28-2021, 04:09 PM
|
#883 |
|
Tri-State Post Whore
|
I want to drive a beater e30 daily so bad it hurts, and I also need a test car for the parts bizz that I don't feel bad about leaving in regular states of disarray. I now on my fourth attempt to find a worthy car.
Attempt #1 - got an '89 iX from Ohio and it was a total rust bucket disguised by seam sealer and undercoat Attempt #2 - got a manual '89 iS from southern Indiana through my good buddy - sold it because I bought the 3 story pile of e30 parts Attempt #3 - got an auto '89 iS from a guy I did work for. Seemed promising, but the more I tore into it, the more rust I found. This brings us to Attempt #4, which seems like 'the one'. A different buddy knew I was on the hunt and told me that a shop in Indy had a late 318 no title parts car that he wanted to get rid of. I went to look at it and the car was solid- paint wasn't terrible, body was solid, etc, and he ended up having a clean title for it! Excited, I brought it home to get it running. Upon further inspection I saw that someone along the way before he had it chopped the chassis harness behind the fuse box, which really heightened the scope of the repairs which is par for the course, and made me quite sad. Engine turns over by hand and feels normal. Clutch pedal is dead. I am ultimately trying to find/follow a pattern of why it was turned into a parts car in the first place so I can better gauge what it'll need. Car has Vogtland springs which feel like trash - way too soft/low by what I can tell so far. The car has poorly rolled fenders as well. Overall the body is solid, and once it has a good chassis harness, I think it'l be a winner.  Untitled by Bobbie Morrone, on Flickr Untitled by Bobbie Morrone, on Flickr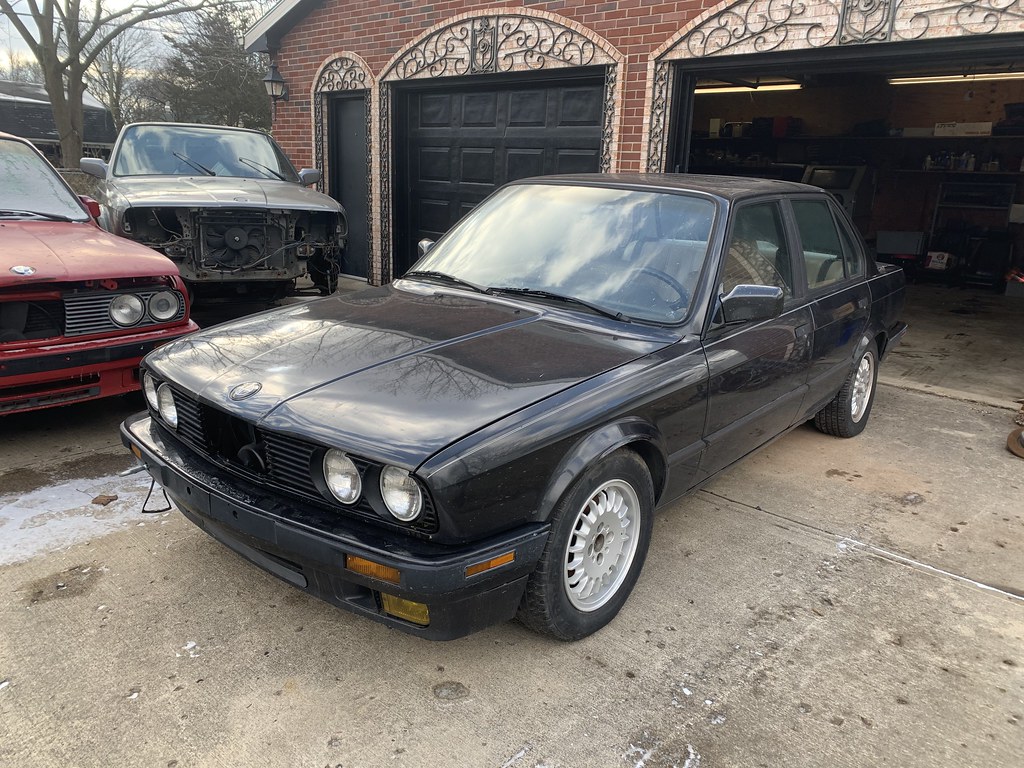 Untitled by Bobbie Morrone, on Flickr Untitled by Bobbie Morrone, on Flickr Untitled by Bobbie Morrone, on Flickr Untitled by Bobbie Morrone, on Flickr Untitled by Bobbie Morrone, on Flickr Untitled by Bobbie Morrone, on Flickr Untitled by Bobbie Morrone, on Flickr Untitled by Bobbie Morrone, on Flickr Untitled by Bobbie Morrone, on Flickr Untitled by Bobbie Morrone, on Flickr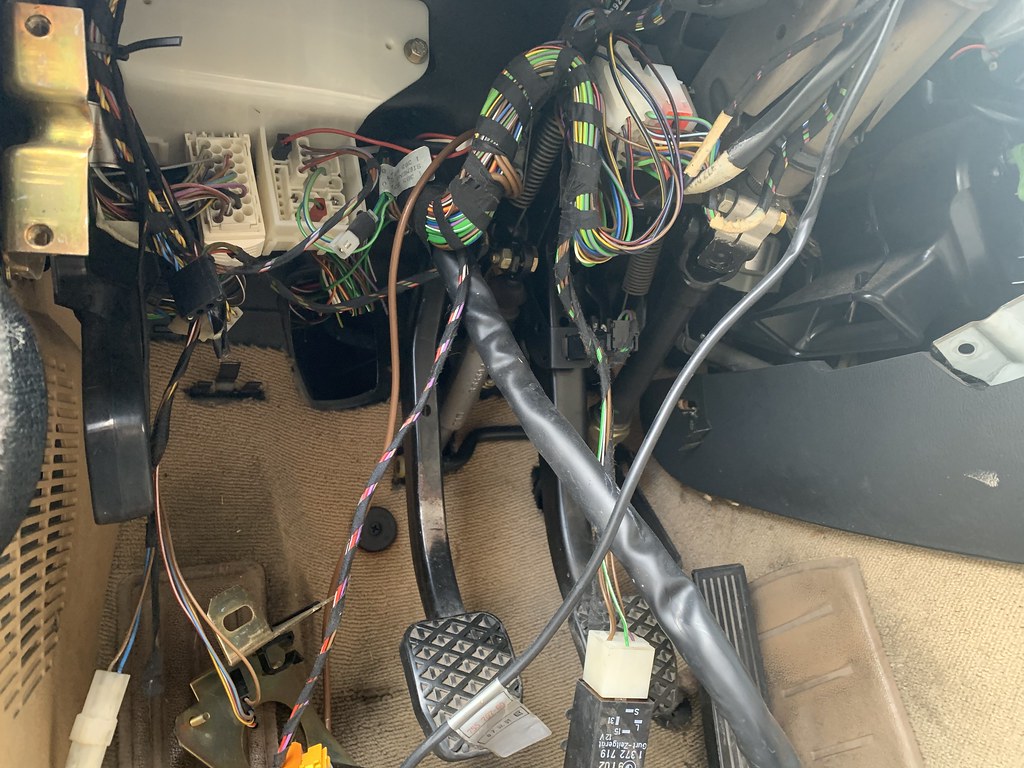 Untitled by Bobbie Morrone, on Flickr Untitled by Bobbie Morrone, on Flickr Untitled by Bobbie Morrone, on Flickr Untitled by Bobbie Morrone, on Flickr----------------- I wanted to get this chassis harness project completed as to not let it simmer, so tonight I pulled the dash, carpet, interior trims, etc etc to assess the rust and start the chassis harness removal. I'm picking up another '91 318 chassis harness tomorrow on lunch, and am going to get back at it to see if I can't get this finished up tomorrow. I am, however, looking for a better dash to put back in the car, as this current one has seen better days. Oh, and LOOK AT THESE FLOORS!! I certainly feel blessed to have found this car, despite the circumstances with the harness.  Untitled by Bobbie Morrone, on Flickr Untitled by Bobbie Morrone, on Flickr Untitled by Bobbie Morrone, on Flickr Untitled by Bobbie Morrone, on Flickr Untitled by Bobbie Morrone, on Flickr Untitled by Bobbie Morrone, on FlickrStarting to get a picture of why the harness was cut. This fusible link repair is scary. Oh, and I found the ultimate duo: a grinder under the seat paired with the clear eyes in the front ash tray.  Untitled by Bobbie Morrone, on Flickr Untitled by Bobbie Morrone, on Flickr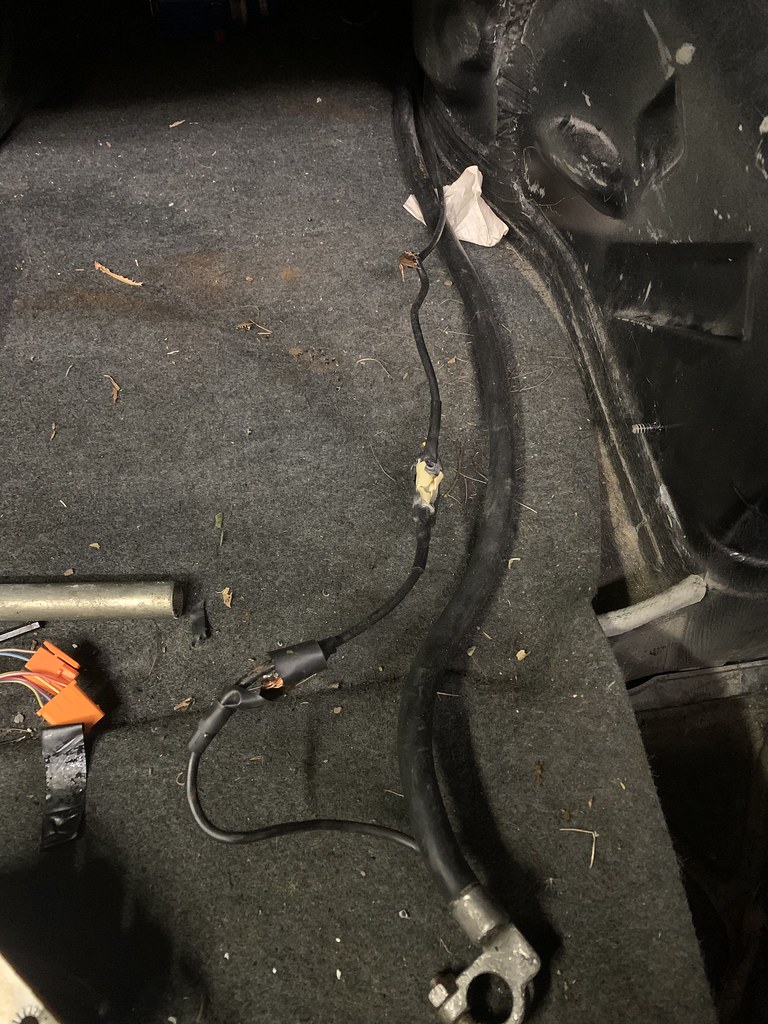 Untitled by Bobbie Morrone, on Flickr Untitled by Bobbie Morrone, on Flickr Untitled by Bobbie Morrone, on Flickr Untitled by Bobbie Morrone, on FlickrA little bit of surface rust around the accelerator pedal bracket, but outside of that these floors are in incredible shape. I am quite pleased.  Untitled by Bobbie Morrone, on Flickr Untitled by Bobbie Morrone, on Flickr Untitled by Bobbie Morrone, on Flickr Untitled by Bobbie Morrone, on Flickr Untitled by Bobbie Morrone, on Flickr Untitled by Bobbie Morrone, on FlickrMore to come over the weekend when I get this new chassis harness in the car! Last edited by blue91lx; 01-28-2021 at 10:17 PM. |
|
|
|
|
04-09-2021, 10:19 AM
|
#884 |
|
Tri-State Post Whore
|
The little 318 is coming along, albeit slowly.
I got the harness fed through the firewall, and started routing the harness. This harness I got has had so many modifications/repairs. Evidence all over of an alarm system that just was just hacked to death. A full day and a roll of Tessa tape later, I got most of the front drivers side harnesses and sub harnesses in place. What a pain this is. Since this is also my test vehicle, I have to add cruise control, 13 button OBC, and a 4ch radio harness. So all of that has been a blast to retrofit so far. 2/3 of my 4ch radio harnesses were for a vert which has different rear speaker placement. It's been a fun day of chasing wires, to say the least. I am also converting to premium sound while I am at it. This will be a pimped out 318.  Untitled by Bobbie Morrone, on Flickr Untitled by Bobbie Morrone, on Flickr Untitled by Bobbie Morrone, on Flickr Untitled by Bobbie Morrone, on Flickr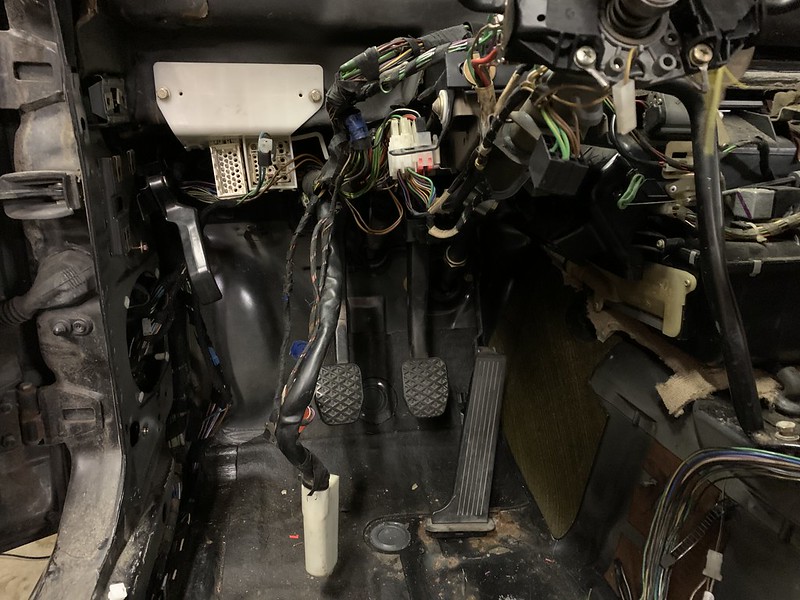 Untitled by Bobbie Morrone, on Flickr Untitled by Bobbie Morrone, on Flickr Untitled by Bobbie Morrone, on Flickr Untitled by Bobbie Morrone, on FlickrStuff like this is ALL over the harness that I have had to fix. Two before:  Untitled by Bobbie Morrone, on Flickr Untitled by Bobbie Morrone, on Flickr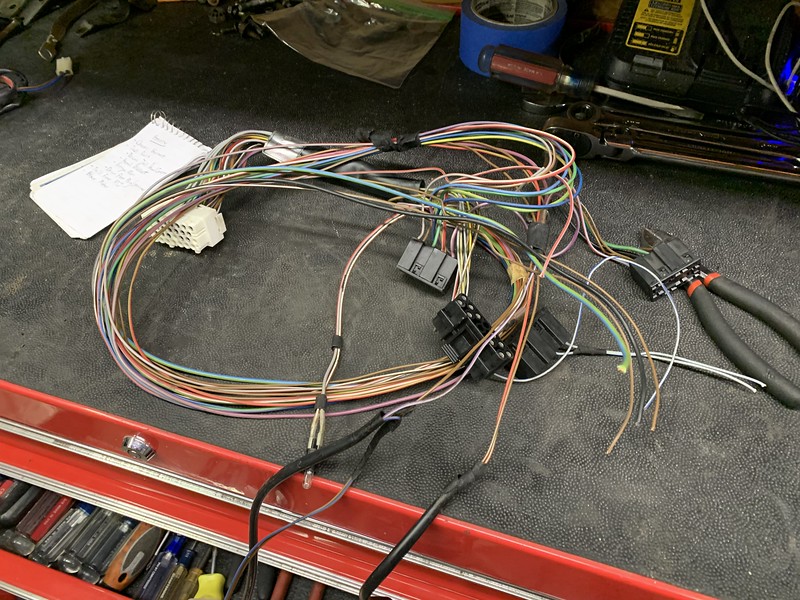 Untitled by Bobbie Morrone, on Flickr Untitled by Bobbie Morrone, on FlickrAfter:  Untitled by Bobbie Morrone, on Flickr Untitled by Bobbie Morrone, on FlickrAfter that, I got the chassis harness OUT and loosely mapped -Drivers rear impact of some sort repaired in the past. I need to grind, coat, and re seam seal. Repair looks well done. -Random spot of rust on the passenger floor pan I missed. Grind and seam seal is the solution. -License plate lights free of rust I have a chip/19# injectors coming, along with some cool oil additive he (SSSquid) has been working on, called Squid Ink. He has a Wiki page with a ton of details about oil analysis. Check it out: https://oil.sssquid.com/wiki/index.php/Main_Page I'm about ready to place my first order for parts. Mostly cheap housekeeping stuff, thankfully.  Untitled by Bobbie Morrone, on Flickr Untitled by Bobbie Morrone, on Flickr Untitled by Bobbie Morrone, on Flickr Untitled by Bobbie Morrone, on Flickr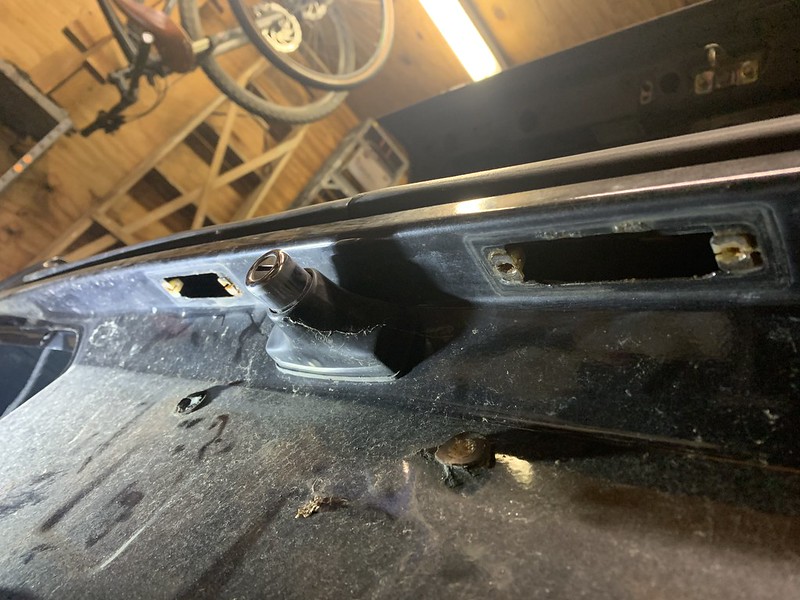 Untitled by Bobbie Morrone, on Flickr Untitled by Bobbie Morrone, on Flickr Untitled by Bobbie Morrone, on Flickr Untitled by Bobbie Morrone, on Flickr Untitled by Bobbie Morrone, on Flickr Untitled by Bobbie Morrone, on Flickr Untitled by Bobbie Morrone, on Flickr Untitled by Bobbie Morrone, on FlickrI ground down the surface rust spots and applied POR-15. The rear damage wasn't bad once I ground it down- the shop who repaired it didn't coat the metal under the seam sealer, which is why it looked scary. Seems to be a common occurrence. I need to do another coat and seam seal a few areas and she'll be golden. Also the fragile, plastic horn piece was not present when I got the car. Pulled one off of the parts car and used some rivets to mount it up. Someday when I feel like putting myself through more misery I will finish the chassis harness. I have had to do so many repairs I got mad at the car for being a huge project and took a break from it.  Untitled by Bobbie Morrone, on Flickr Untitled by Bobbie Morrone, on Flickr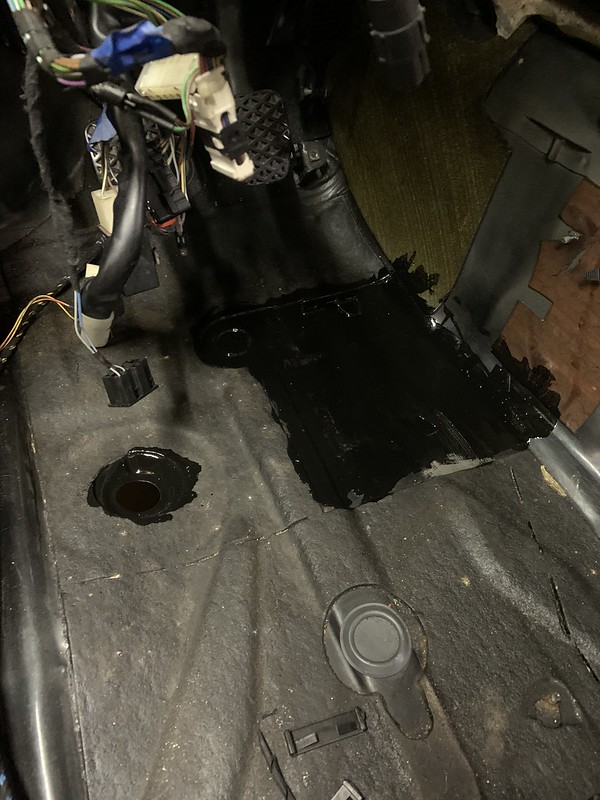 Untitled by Bobbie Morrone, on Flickr Untitled by Bobbie Morrone, on Flickr Untitled by Bobbie Morrone, on Flickr Untitled by Bobbie Morrone, on FlickrI got the rear side marker pigtails cut in from a good car, and installed a new battery cable to replaced the one that was in the car, that had three splices in it on the ECU power wire. I have some splicing to do on the front of the car and will finally be ready to hook a battery up and start to do some testing.  Untitled by Bobbie Morrone, on Flickr Untitled by Bobbie Morrone, on Flickr Untitled by Bobbie Morrone, on Flickr Untitled by Bobbie Morrone, on FlickrThe reason for the slow progress. My buddy Matt and I have been turning this:  Untitled by Bobbie Morrone, on Flickr Untitled by Bobbie Morrone, on FlickrInto this:  Untitled by Bobbie Morrone, on Flickr Untitled by Bobbie Morrone, on FlickrI set a goal to get an "area" of the car finished up tonight after work, so I picked the passenger front corner. I had to splice turn signal, side marker, A/C, ABS, horn, fog light and washer fluid pump pigtails because they were gone on the harness I pulled out of the Atlantic Ocean. This is what I'm dealing with: 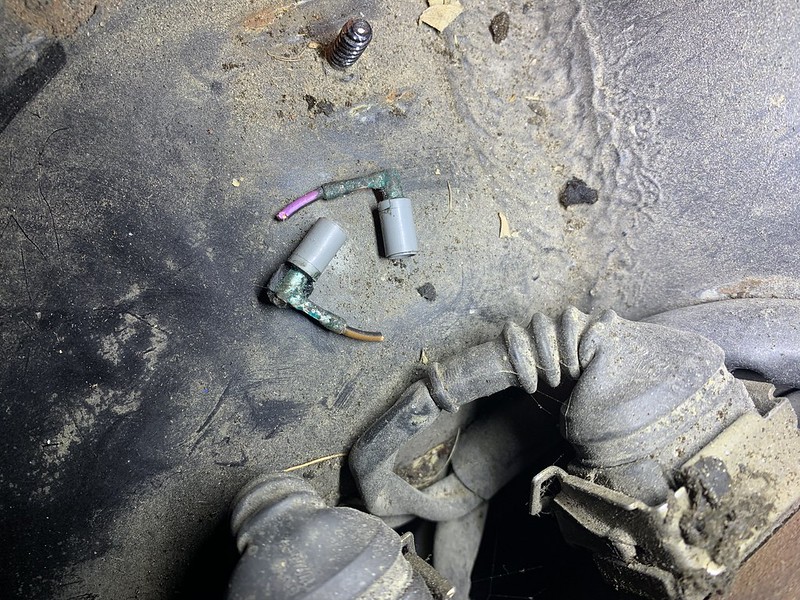 Untitled by Bobbie Morrone, on Flickr Untitled by Bobbie Morrone, on Flickr Untitled by Bobbie Morrone, on Flickr Untitled by Bobbie Morrone, on Flickr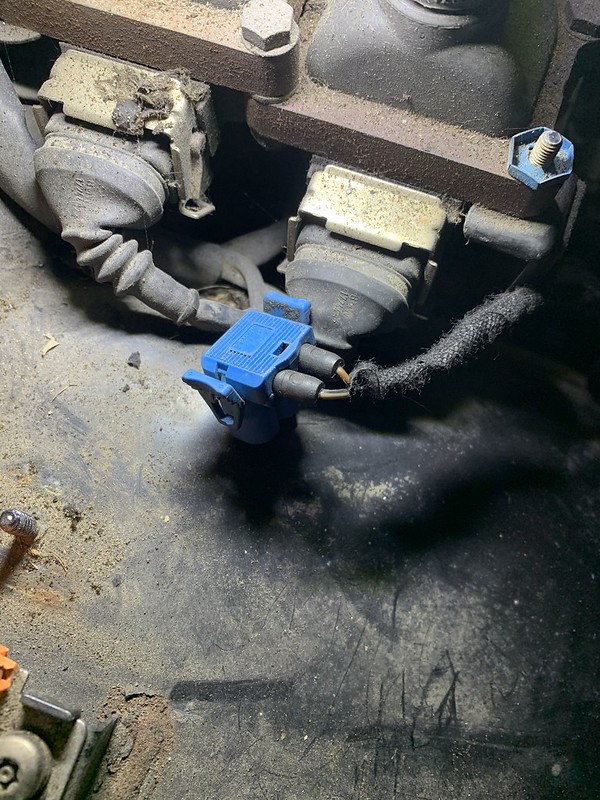 Untitled by Bobbie Morrone, on Flickr Untitled by Bobbie Morrone, on FlickrIt's not routed properly, but I don't care all too much, because it's functional. Also, note, since the car is '91 it came with the r134 pressure switch setup, which is nice.  Untitled by Bobbie Morrone, on Flickr Untitled by Bobbie Morrone, on FlickrPulled out my headlight parts and got the adjusters freed up, replaced a few misc springs/etc and threw the headlight in with a euro grill, as well as a decent used ZKW fog, courtesy of mjweimer. These are terrible yellow ebay fogs:  Untitled by Bobbie Morrone, on Flickr Untitled by Bobbie Morrone, on FlickrMuch better:  Untitled by Bobbie Morrone, on Flickr Untitled by Bobbie Morrone, on FlickrAlso, got rear side markers installed, as well as some red tails that I took from Linda (Linda went back to clean stock tails). Really cleaned up the rear end. I have a good spare bumper trim that I'll throw on someday, also courtesy of mjweimer. I got these wheels from Dwight through helping him with some work, and normally don't care for them, but I think they look really neat on this car, so here they will stay.  Untitled by Bobbie Morrone, on Flickr Untitled by Bobbie Morrone, on Flickr Untitled by Bobbie Morrone, on Flickr Untitled by Bobbie Morrone, on FlickrI finished up the drivers side of the engine bay part of the chassis harness and got it all tidied up, and finished up the battery terminal/cable install. This side turned out better than the passenger side, me thinks.  Untitled by Bobbie Morrone, on Flickr Untitled by Bobbie Morrone, on Flickr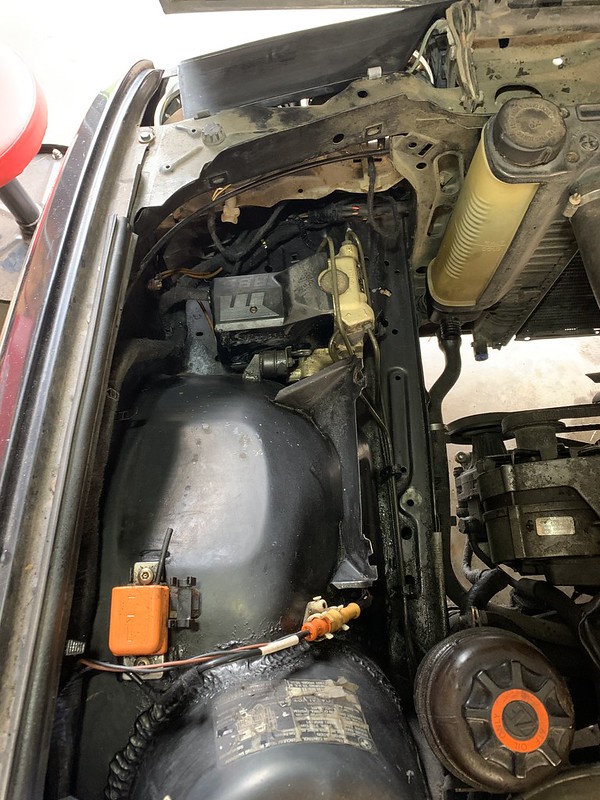 Untitled by Bobbie Morrone, on Flickr Untitled by Bobbie Morrone, on Flickr Untitled by Bobbie Morrone, on Flickr Untitled by Bobbie Morrone, on FlickrI think that brings things up to date. Last edited by blue91lx; 04-09-2021 at 10:28 AM. |
|
|
|
|
04-09-2021, 10:35 AM
|
#885 |
|
Tri-State Post Whore
|
Linda, the iS, is awaiting exhaust work and a tune.
My buddy Jay (SSSquid) is modeling my pistons and CFD testing so he can get the tune as close as possible, since the setup is pretty unique/oddball. I did some stuff with the r134 conversion, had to redo my radiator setup, etc. As part of my A/C conversion, I had to replace my electric pusher fan with a puller fan so I could fit the new parallel flow condenser. I got the same medium profile Spal fan with the Condor fan mounts, but sadly the M42 end tanks are thiccc bois because and the puller fan setup doesn't clear the radiator. So, I had to switch back to an M20 rad setup. The parts for that are in the mail, and then I can get some miles on this thing. I never buttoned up the interior from the new dash install, so I took time to do that. I have just been doing as much as I can to tidy up projects that have been looming for quite some time. Puller fan no fit:  Untitled by Bobbie Morrone, on Flickr Untitled by Bobbie Morrone, on Flickr Untitled by Bobbie Morrone, on Flickr Untitled by Bobbie Morrone, on FlickrReinstalling stud for late model coolant overflow that I cut off in a past life.  Untitled by Bobbie Morrone, on Flickr Untitled by Bobbie Morrone, on FlickrGot the rear clip for the non-airbag knee panel to fit nicely over the nut on the steering column. Airbag column is thinner, so this clip has to go over the nut otherwise it doesn't stay on and your new shiny panel will sag and break.  Untitled by Bobbie Morrone, on Flickr Untitled by Bobbie Morrone, on FlickrNot a bunch of disassembled bits anymore woohoo  Untitled by Bobbie Morrone, on Flickr Untitled by Bobbie Morrone, on FlickrWhen I got this car I cut off the airbox bracket, which I have regretted ever since. I found a decent way to mount the relays and executed that tonight. I used thread-serts in my coolant overflow and then made some countersunk bolts to hold it in place. I can't run the relay cover but it's a half decent mounting solution all things considered. I also mounted the m20 Nissens rad and got the puller fan sorted. Fit/finish was junk compared to what Nissens usually produces. I may exchange it for a different unit. Bends in the core, a bunch of casting flaws, etc etc. The only way my fan would fit properly was off to the side. I am hoping this is adequate. Part of me wishes I just ran a stock aux fan and a stock mechanical fan, but it's a bit too late for that. Dbilas is having supply chain issues due to covid, so my intake order is still unfulfilled, sadly. I have exhaust work lined up, so the plan is to finish the cooling system, get the exhaust done (which will mean having an 02 sensor again), finish breaking the engine in, and convert over to megasqurit, tune it, and dyno it. A large part of me wants to sell the car when it's done to focus on the M3, but we shall see what happens.  Untitled by Bobbie Morrone, on Flickr Untitled by Bobbie Morrone, on Flickr Untitled by Bobbie Morrone, on Flickr Untitled by Bobbie Morrone, on Flickr Untitled by Bobbie Morrone, on Flickr Untitled by Bobbie Morrone, on FlickrMy warehouse happens to be attached to an alternator rebuild shop. I took the eyesore that was the old placeholder alternator and had him refinish it. I got that and the rest of the accessories bolted up/belts tightened. Just waiting on one more A/C hose and my dbilas FlowMaster intake (which finally shipped!) before I can throw everything back together and drop the car off for the exhaust fabrication. I'm pretty sure the compressor I am using is good. If not, I will send one off to Jay Stratton for a rebuild. Will find out once I test the clutch and vacuum test it before putting freon in.  Untitled by Bobbie Morrone, on Flickr Untitled by Bobbie Morrone, on Flickr Untitled by Bobbie Morrone, on Flickr Untitled by Bobbie Morrone, on FlickrMy buddy mr SSSquid mentioned that he had a new M20 product out, so I picked one up. It's an intake ssspacer, that helps even airflow to each cylinder. His dyno results were impressive, see here: https://sssquid.com/v3/ssshop/ssspacer-m20/ Install was straight forward- double nut to remove the old studs, double nut to install longer studs. My throttle cable required a slight adjustment afterwords, and I had to bend my PS resevoir bracket. I have a BBTB, and the spacer was larger in diameter, so it worked out well.  Untitled by Bobbie Morrone, on Flickr Untitled by Bobbie Morrone, on Flickr Untitled by Bobbie Morrone, on Flickr Untitled by Bobbie Morrone, on FlickrI got my dbilas Flowmaster Intake in from the motherland. I need to borrow Mr Matt's rivnut tool to make a bracket, and she'll be in business. I'm going to have my buddy make an intake pipe for it (for megasquirt) when the car is there for the exhaust work.  Untitled by Bobbie Morrone, on Flickr Untitled by Bobbie Morrone, on FlickrAnd my 4 seasons A/C hose wasn't even close to being correct. Their stuff is obviously cheap, but this fitment was junk. I suspect it is setup for a different compressor, but even then, the fittings were in the wrong orientation.  Untitled by Bobbie Morrone, on Flickr Untitled by Bobbie Morrone, on FlickrPut fresh plugs in, drained out the "first start" oil and put in the good stuff! Oh, and I really need help with exhaust. I've been through the wait list at 4 shops now, all who have since bailed.  Untitled by Bobbie Morrone, on Flickr Untitled by Bobbie Morrone, on FlickrI posted up my Stromung on the local Indy E30 page with like 30 members and got a message from a guy who had the exact exhaust parts I was looking for and wanted to trade for a bolt-on catback. Funny how things work out sometimes. I got his bits plus some coin to contribute to the exhaust fab, so I think this will work out very well. It's going to be 2.25" dual out of the headers, back 64" to the Y pipe which turns it into single 2.5" to the muffler which is single 2.5" in and a dual tip out.  Untitled by Bobbie Morrone, on Flickr Untitled by Bobbie Morrone, on Flickr Untitled by Bobbie Morrone, on Flickr Untitled by Bobbie Morrone, on FlickrI think that brings us up to speed on both cars! M3 is still sad, sitting in a garage back in PA. |
|
|
|
|
04-09-2021, 02:36 PM
|
#886 |
|
Tri-State Post Whore
 |
Thanks for the update! Love reading your detailed posts.
The harness and resto work on the beater is annoying, but sooo worth it. Linda is gonna be kick ass. The throttle body spacer/flow enhancer thingy is neat. Cylinder 5 still sucks compared, but way better! I feel you on exhaust, I want to do a fairly simple custom exhaust for my RX-8 and it's a PITA. |
|
|
|
|
04-09-2021, 09:59 PM
|
#887 | |
|
Tri-State Post Whore
|
Quote:
And yeah, that little spacer appears to do wonders. The big restriction with the M20 is the stock intake manifold, so really, anything helps when you've got a more serious setup like the 3.1L in Linda. I also took a new, fully built 2.8L stroker (stroked from 2.5L) in on trade with high compression pistons, carillo rods, a 304 cam, ferra valves, etc etc, that may land in the hoopty 318 if I find that motor is junk. Everything I am putting back together looks as if someone was prepping for engine removal. I'm hoping the lil' 4cyl is good, but if not, it'll get a stroked M20 as well. And man..... I have called and called on exhaust work. The only shop who would do the work wanted $3K to do it. It's crazy. There's a shop an hour and a half south that can do it, they're old school guys and do good work for a fair price. Once I get the tune in the car and some local miles, I will likely just make that trip and be done with it, because no one else wants to touch exhaust work apparently. I forgot to update as well... I'm ditching the tan interior for some nice black sport interior. Installed the cards and it gives some perspective. Last job I'll be able to get done this weekend was installing the door cars. I like natur leather sport interior, but cannot stand tan vinyl comfort interior..... so it had to go. I had these cards and a grey carpet in the stash. Just need to find manual window crank plugs and rear arm rests in black. 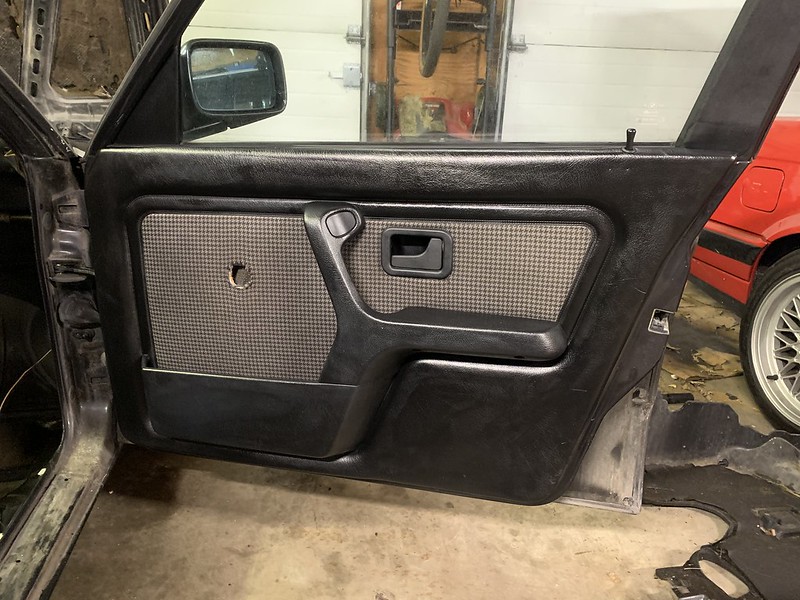 Untitled by Bobbie Morrone, on Flickr Untitled by Bobbie Morrone, on Flickr Untitled by Bobbie Morrone, on Flickr Untitled by Bobbie Morrone, on Flickr
|
|
|
|
|
|
04-15-2021, 09:57 AM
|
#888 |
|
Tri-State Post Whore
|
I never have anything to say or add other than I love seeing the updates, progress, and of course the plethora of pictures! Great work and as always, looking forward to more!
__________________
- Pat '10 Touareg TDI w/air - deleted/tuned, tow pig, offroad-ish project '15 Sportwagen TDI SEL LP - Daily |
|
|
|
|
04-25-2021, 02:20 PM
|
#889 | |
|
Tri-State Post Whore
|
Quote:
I finished routing/plugging in the chassis harness and was.... nervous to plug a battery in. But noises were made, albeit mostly bad noises, but noises nonetheless. Plugged my FB Marketplace 318 cluster in (SI Batteries weren't dead!), put a battery in, turned the key to accessory, and we have lights! Poked around a bunch with a multimeter before trying to turn over the engine with the starter. Replaced the stolen relays in the engine harness, and tried to crank the car. At this point, I have the fuel pump fuse removed, because I didn't realize a 318 w/ small fuel tank accepts fuel return at the hanger, and the fuel in the tank needs to be drained, so I need to source the proper hanger/drain tank before I can fire it on petrol. Try to turn the motor over, no dice. Did some more digging (never owned an m42 car, so it's all new to me), and realized someone robbed the engine ground that runs from the passenger motor mount to the frame rail. Put one on from a parts car, and..... the motor cranks!! Obviously no fire due to no fuel. So, I deemed it necessary to try to fire on starting fluid which was a very bad idea. It backfired super bad so I called it quits and am going to wait for the right fuel pump setup to come in before I go any further. I also put on a new piece of HVAC box foam while things were apart. Diff sensor pigtail grossness  Untitled by Bobbie Morrone, on Flickr Untitled by Bobbie Morrone, on Flickr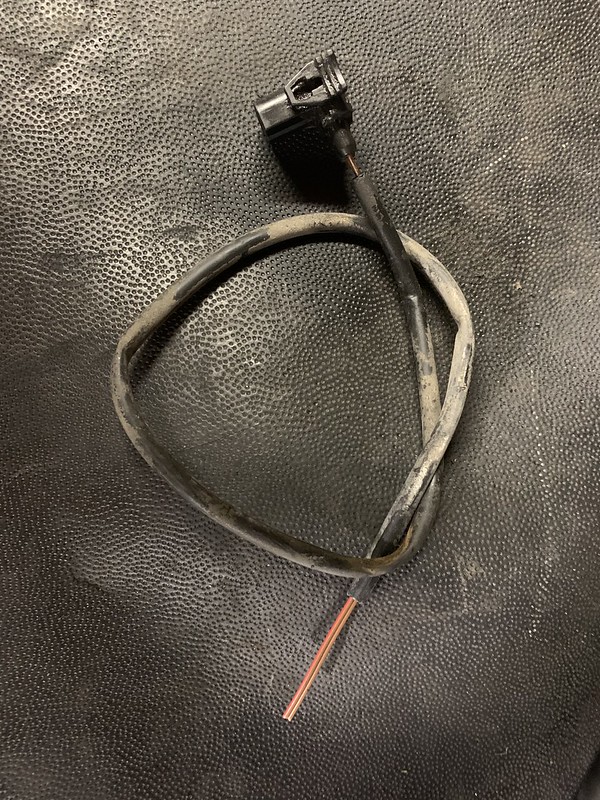 Untitled by Bobbie Morrone, on Flickr Untitled by Bobbie Morrone, on FlickrFoam:  Untitled by Bobbie Morrone, on Flickr Untitled by Bobbie Morrone, on FlickrHad to drop the tank a substantial amount to get the harness routed above the tank. Wrong 325i fuel pump assy.  Untitled by Bobbie Morrone, on Flickr Untitled by Bobbie Morrone, on FlickrLights!  Untitled by Bobbie Morrone, on Flickr Untitled by Bobbie Morrone, on Flickr
|
|
|
|
|
|
04-29-2021, 01:40 PM
|
#890 |
|
Tri-State Post Whore
|
Got sick of messing with the dash and took a break on the cluster. Cluster work is oddly relaxing.
My goal was to take this good 318 cluster and combine it with the good frame on this parts cluster, and address whatever I find during that process.  Untitled by Bobbie Morrone, on Flickr Untitled by Bobbie Morrone, on FlickrDisassemble 318 cluster  Untitled by Bobbie Morrone, on Flickr Untitled by Bobbie Morrone, on FlickrAlways make sure there is a washer in between the back of the fuel/temp gauges and the main board, like so 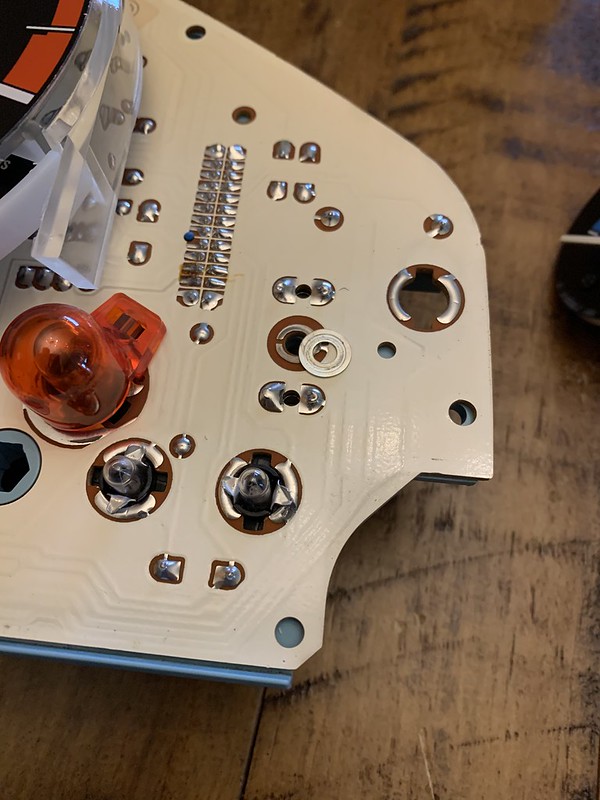 Untitled by Bobbie Morrone, on Flickr Untitled by Bobbie Morrone, on FlickrODO gears were shot as expected. Found a spare set in the garage  Untitled by Bobbie Morrone, on Flickr Untitled by Bobbie Morrone, on Flickr Untitled by Bobbie Morrone, on Flickr Untitled by Bobbie Morrone, on FlickrInstall my brother's trim rings into the new cluster frame. I can't say enough about how much this enhances the cluster's look to me. They just snap into place, too.  Untitled by Bobbie Morrone, on Flickr Untitled by Bobbie Morrone, on FlickrInstall good SI board into good frame  Untitled by Bobbie Morrone, on Flickr Untitled by Bobbie Morrone, on FlickrPut it together and add the (green) coding plug for adding cruise control to the 318. Take note, because the late 318 doesn't come with an overhead check panel, there is no center bulb for the "check light" in the cluster 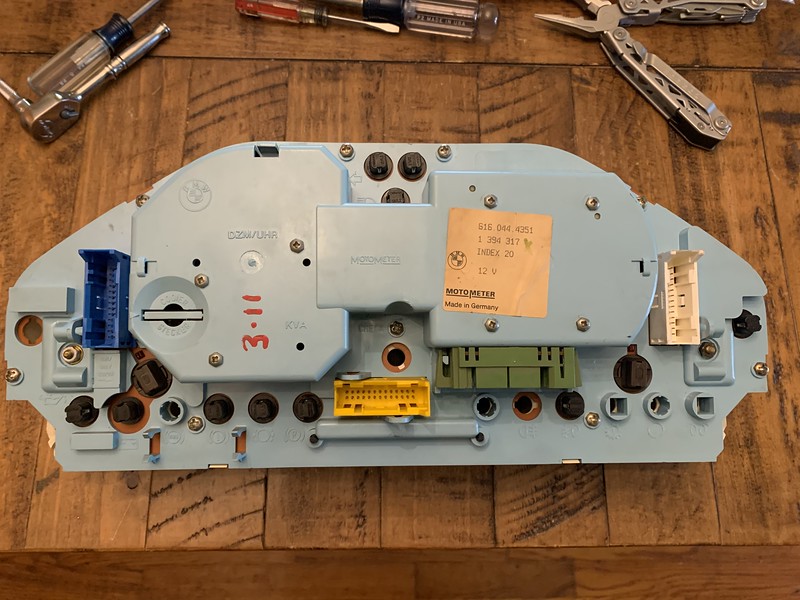 Untitled by Bobbie Morrone, on Flickr Untitled by Bobbie Morrone, on FlickrMake lens shiny and affix to frame  Untitled by Bobbie Morrone, on Flickr Untitled by Bobbie Morrone, on FlickrAll done! I've been taking a day off each week to try to finish up projects, one of which is hoopte. I cleaned up a spare premium sound parcel shelf I had and put in some black premium sound rear speakers, and repaired a cracked seatbelt clip (triangle that mounts to parcel shelf), and got it installed in the car. I also did some "knock testing" and put some raammat on any panel that needed it. Even a small bit with sound deadening can make a huge difference. 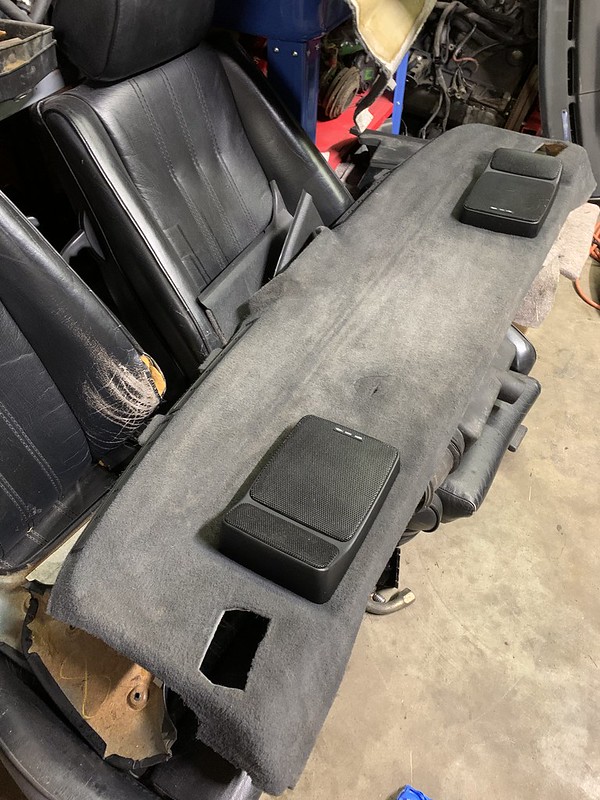 Untitled by Bobbie Morrone, on Flickr Untitled by Bobbie Morrone, on Flickr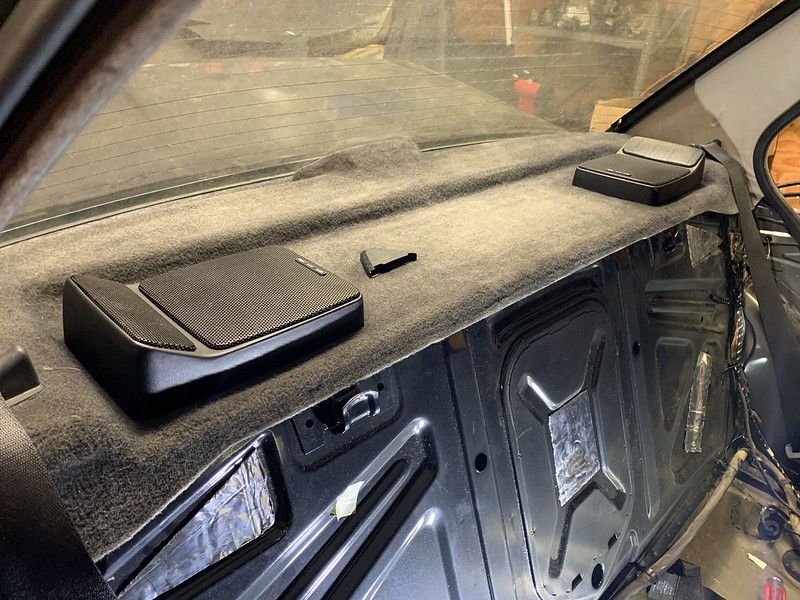 Untitled by Bobbie Morrone, on Flickr Untitled by Bobbie Morrone, on FlickrJust a light tough of sound deadening to reduce vibrations on ringy panels.  Untitled by Bobbie Morrone, on Flickr Untitled by Bobbie Morrone, on Flickr Untitled by Bobbie Morrone, on Flickr Untitled by Bobbie Morrone, on FlickrPut some leather conditioner on the rear leather seats I had and put them in the car, along with the proper sedan rear gray carpet piece I was searching for. In taking this pic I realized I forgot the mat for underneath the rear seat, and installed it.  Untitled by Bobbie Morrone, on Flickr Untitled by Bobbie Morrone, on FlickrAnd theeen it was carpet time! This carpet is out of an iX so it has a small hump for the trans tunnel difference (tcase provisioning), good enough for hoopte.  Untitled by Bobbie Morrone, on Flickr Untitled by Bobbie Morrone, on Flickr Untitled by Bobbie Morrone, on Flickr Untitled by Bobbie Morrone, on FlickrI then dealt with b pillars, and these pesky clips which explode into a million pieces at rapid rates of speed when their removal is attempted, as well as several other various pieces of trim that have to be done in the proper sequence or else things don't fit right.  Untitled by Bobbie Morrone, on Flickr Untitled by Bobbie Morrone, on FlickrIt was time for dash installation, to I had a deeper look at the dash prior to fitting it, and found some damaged bits. Before:  Untitled by Bobbie Morrone, on Flickr Untitled by Bobbie Morrone, on FlickrAfter: 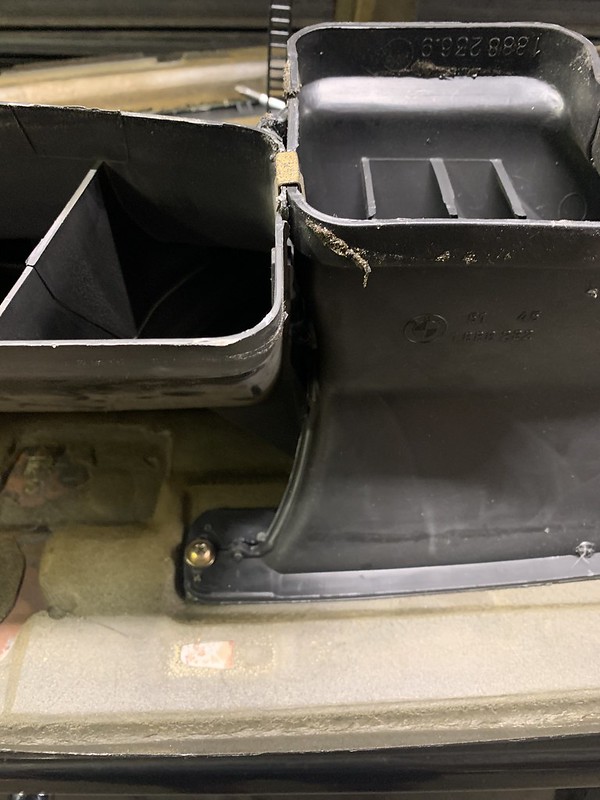 Untitled by Bobbie Morrone, on Flickr Untitled by Bobbie Morrone, on FlickrThen fitted a good A pillar (one on car was missing)  Untitled by Bobbie Morrone, on Flickr Untitled by Bobbie Morrone, on FlickrAfter getting all of that sorted, I put the dash in! Note to self here, install upper column trim before fitting dashboard  Untitled by Bobbie Morrone, on Flickr Untitled by Bobbie Morrone, on FlickrHad to realOEM to find the correct orientation of the M42 ECU bracketry (first 4cyl E30 I've ever owned, and/or seen in the flesh)  Untitled by Bobbie Morrone, on Flickr Untitled by Bobbie Morrone, on FlickrSpent the rest of the evening routing wires and getting things mounted up correctly in regards to the extra support pieces for the airbag specific dash, etc. Also waiting on my canteloupe radio wiring kit to wire up the stereo. PSA looking for a 5908 if someone reading this has one they'd like to sell. I bought one and it got damaged in shipping and couldn't be repaired.  Untitled by Bobbie Morrone, on Flickr Untitled by Bobbie Morrone, on Flickr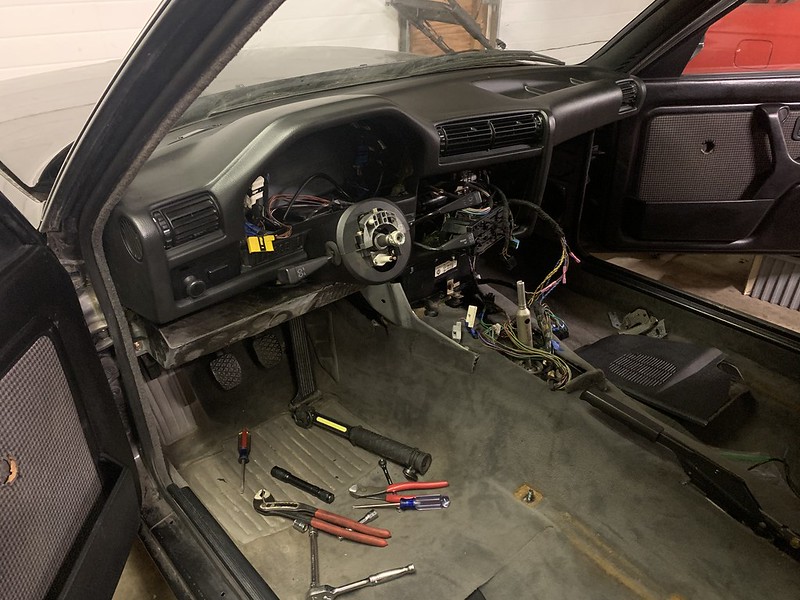 Untitled by Bobbie Morrone, on Flickr Untitled by Bobbie Morrone, on FlickrI have a fuel pump coming so I can work on getting things running. I also need suggestions on a good muffler to pair to the M42 assuming it isn't exploded. I need to spend the rest of the weekend pulling the motor on my FXT, so I wanted to get as much done on this as I could before that project started. Last edited by blue91lx; 04-29-2021 at 09:45 PM. |
|
|
|
|
05-14-2021, 11:48 AM
|
#891 |
|
Tri-State Post Whore
|
More sadness. I cannot wait to have some of these slow burning painful projects completed.
I pulled the FXT's EJ255 and dropped it off as a longblock at the machinist to tear down and replace what's necessary. I would normally fully strip the block, but he said he didn't mind doing the full reseal, which saves me so much time. His rates are fair, and his work so good that I do not mind paying him to do what I don't have time to do. I actually tried to farm out the whole job, but all of my mechanic buddies were 6mo out on work.  Untitled by Bobbie Morrone, on Flickr Untitled by Bobbie Morrone, on Flickr
Last edited by blue91lx; 05-14-2021 at 11:50 AM. |
|
|
|
|
05-20-2021, 06:17 PM
|
#892 |
|
Tri-State Post Whore
|
base tune and 24# injectors are in! The car is running great. Upon installing the injectors I found a small break in wire shielding behind a boot in the fuel injector harness- I am glad I caught that before it gave me issues.
The issue preventing me from driving it currently is that the cooling system will not take more than a gallon of coolant. Once I solve that issue, I can take it for a spin! 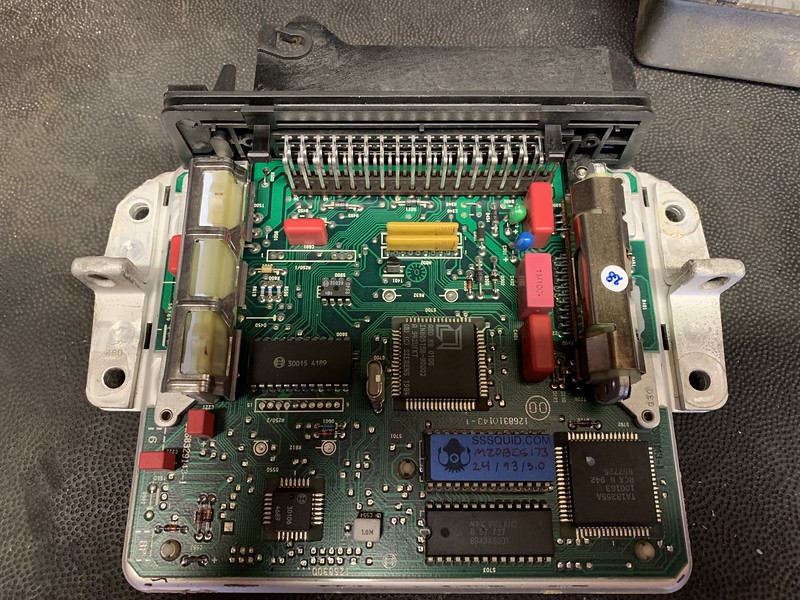 Untitled by Bobbie Morrone, on Flickr Untitled by Bobbie Morrone, on Flickr Untitled by Bobbie Morrone, on Flickr Untitled by Bobbie Morrone, on FlickrIdle vid with the t00n. Still lopey, but very stable and tamed down a bit.  Untitled by Bobbie Morrone, on Flickr Untitled by Bobbie Morrone, on Flickr
|
|
|
|
|
05-24-2021, 08:37 PM
|
#894 | |
|
Tri-State Post Whore
|
Quote:
I ended up draining the entire block and starting over. First filling the block through the thermostat housing, then the radiator through the upper rad hose, and then filling the rest of the way through the overflow. The car then boiled the coolant, but at least now I have circulation. Frustrating, but "you'll have that on these big jobs". |
|
|
|
|
|
05-25-2021, 12:03 AM
|
#895 |
|
Tri-State Post Whore
|
Sounds like my GTI. Even with the bleed hole and the t-stat at the bottom of the system, I had to fill individual components separately or it would overheat before it it ever burped enough air to take more coolant
|
|
|
|
|
05-28-2021, 10:58 AM
|
#898 | |||
|
Tri-State Post Whore
|
Quote:
Quote:
Quote:
|
|||
|
|
|
|
06-03-2021, 01:39 PM
|
#899 | |
|
Tri-State Post Whore
|
Quote:
Task failed successfully |
|
|
|
|
 |
| Bookmarks |
|
|
 Similar Threads
|
||||
| Thread | Thread Starter | Forum | Replies | Last Post |
| Blue91lx's Budget 97' SC2 Lemons/AutoX Project | blue91lx | Member Journals | 15 | 12-30-2012 07:57 PM |


 Linear Mode

