Blows the dust off.. I've been slacking with updates here.
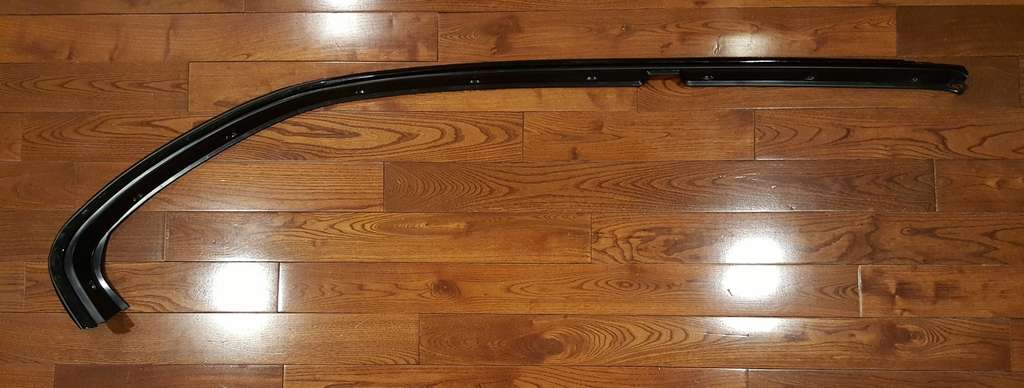
So after many failed attempts at shooting 2k primer and therefore not being able to shoot the roof.. I've decided the car has sat too long and the glass is going back in. My contingency plan for getting good paint coverage is removing the windshield reveal moldings prior to paint and just taping up the rear like I did the 1st repaint.
I went to the junkyard today in hopes of scoring a rear glass reveal molding in good shape. That also didn't go very well. It looks like I'll have to use a universal one.
The good news is I found a 92 SSEi and scored the following for $25
-Rear speaker deck with tweeters
-Rear speakers
-Rear seat belts (mine are rusted and these looked different)
-Trunk lid carpet
-Factory air pump
-Trunk air compressor latch molding
-Sacrificial door seal (to re-space out all my door moldings)
-Drivers door bottom window trim (mine doesn't want to stay seated)
-Front fender to body spacers
I also took the build sheet stashed in the trunk for S&G. It was a blue 2 tone interior car. So a little different.
I've always planned on eventually incorporating a pump into my rear air assist shocks. That's why I picked up the pump. I tested it out and it looks like it's still good:
https://www.youtube.com/watch?v=SC3umKkYGGQ
The front and rear glass is back in as of January. I didn't realize the front top reveal molding needed to be installed with the windshield since the oem one came out so easy. It unfortunately covers up the front lip of the hood where it's only primer at the moment. The good news is I was able to take the front reveal molding out without too much of a struggle. I might leave it out till I get that edge painted or sealed. Depending on how it goes back in, I might install it with some sealer or just have it re-done.
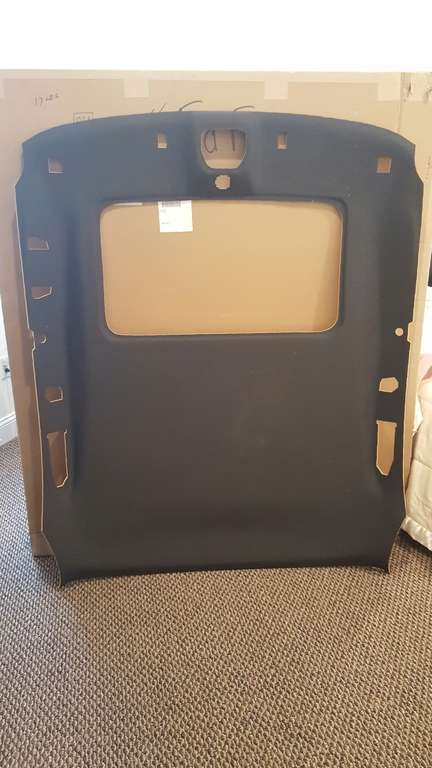
I took the opportunity with the glass out to put the headliner back in so I wouldn't have to taco it through the rear door. When I went to install I realized that when I fiberglassed the problem areas, I made it too thick for the grab handle push locks to properly reach the sheet metal. That, and it developed a couple creases. It's sort-of in for now but I'll need to re-do it.
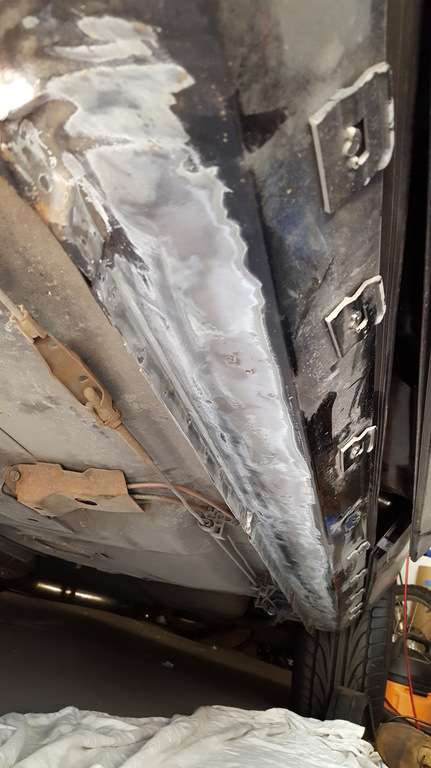
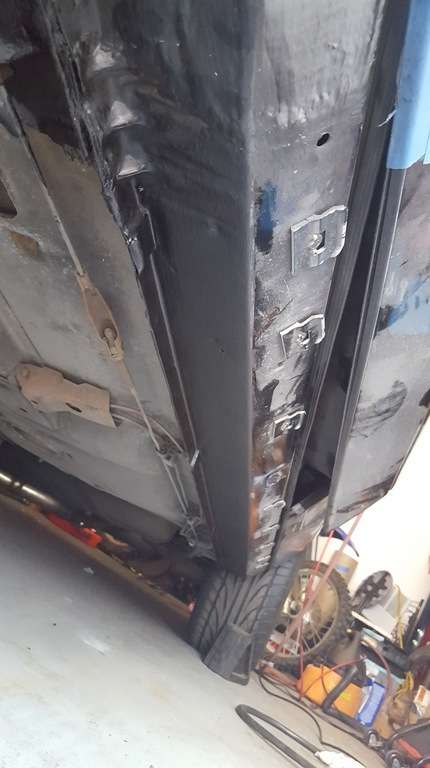
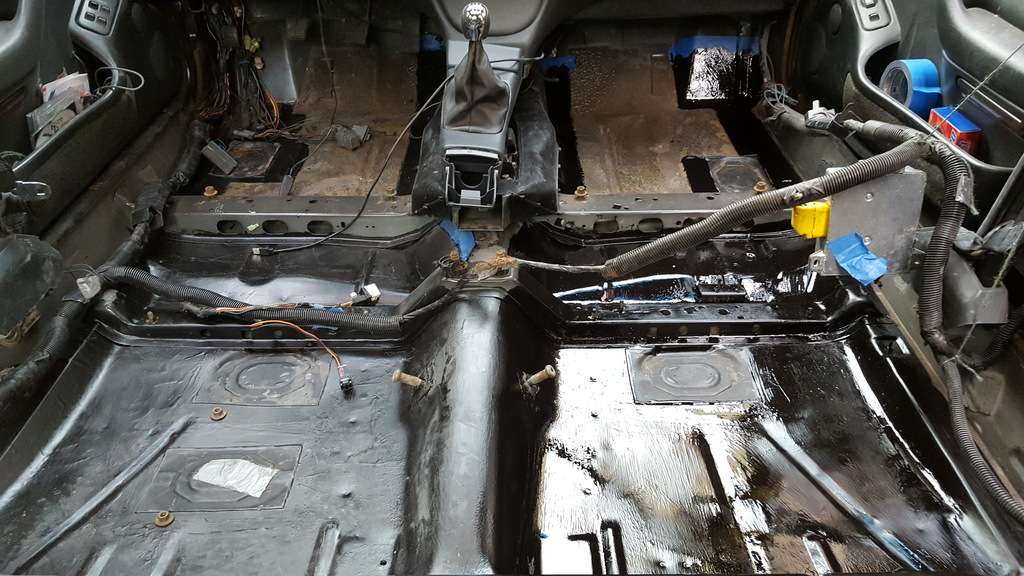
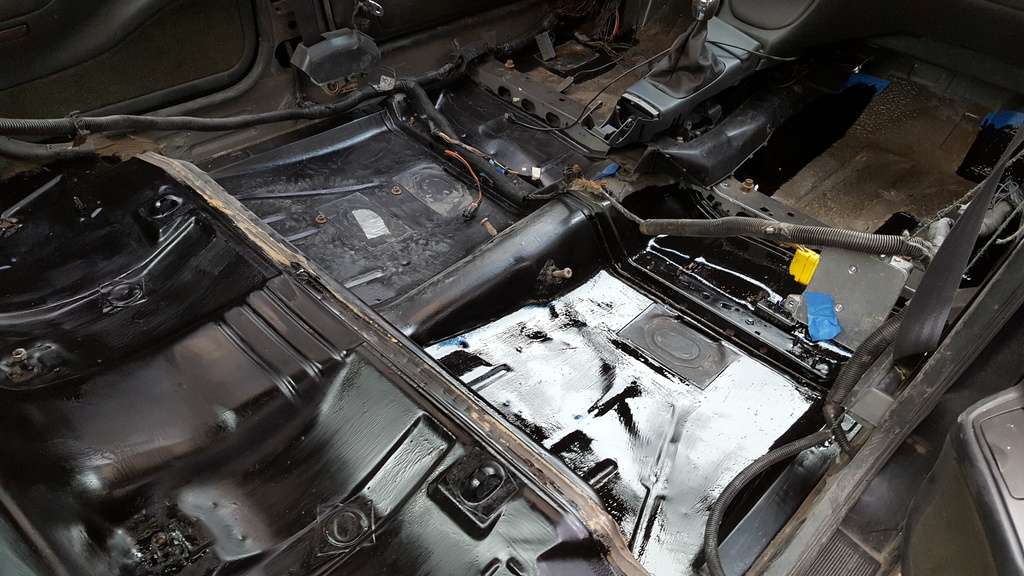
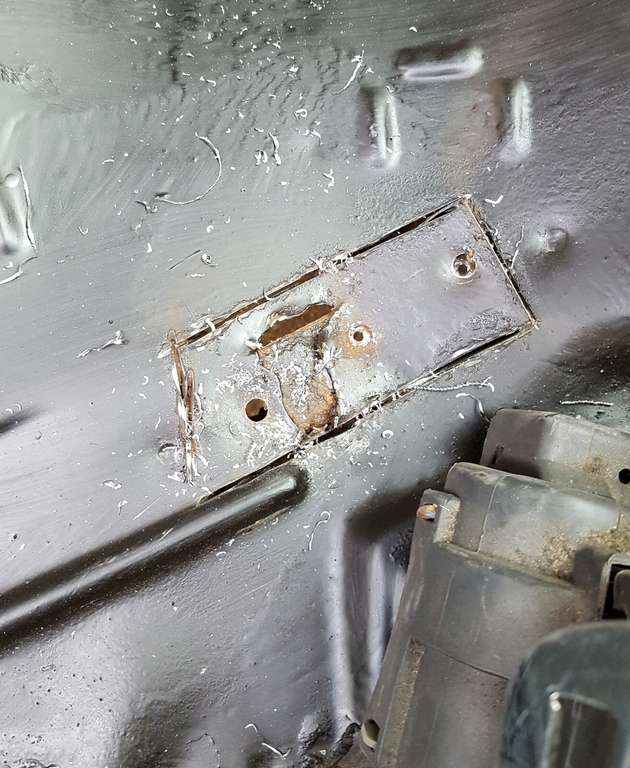
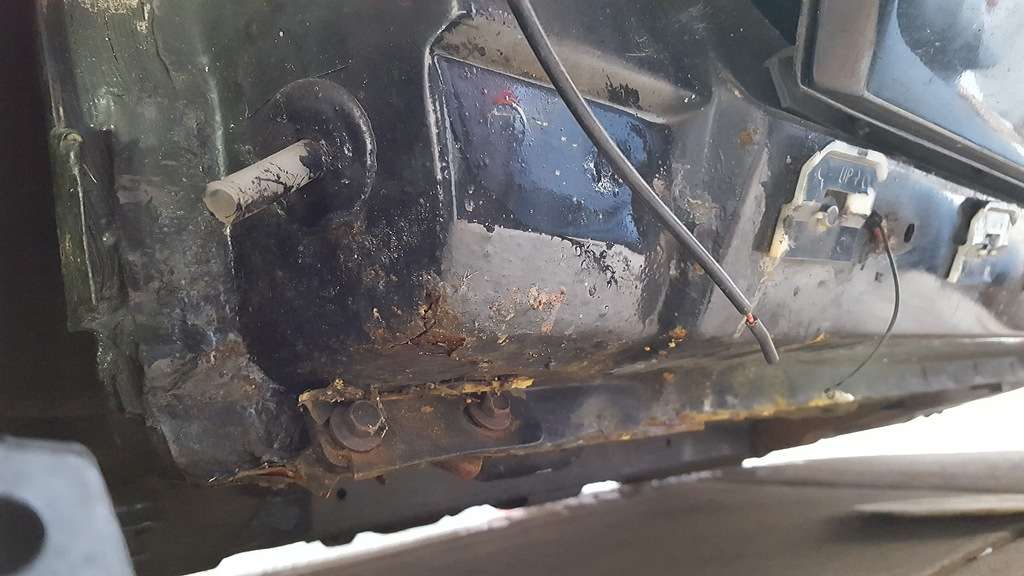
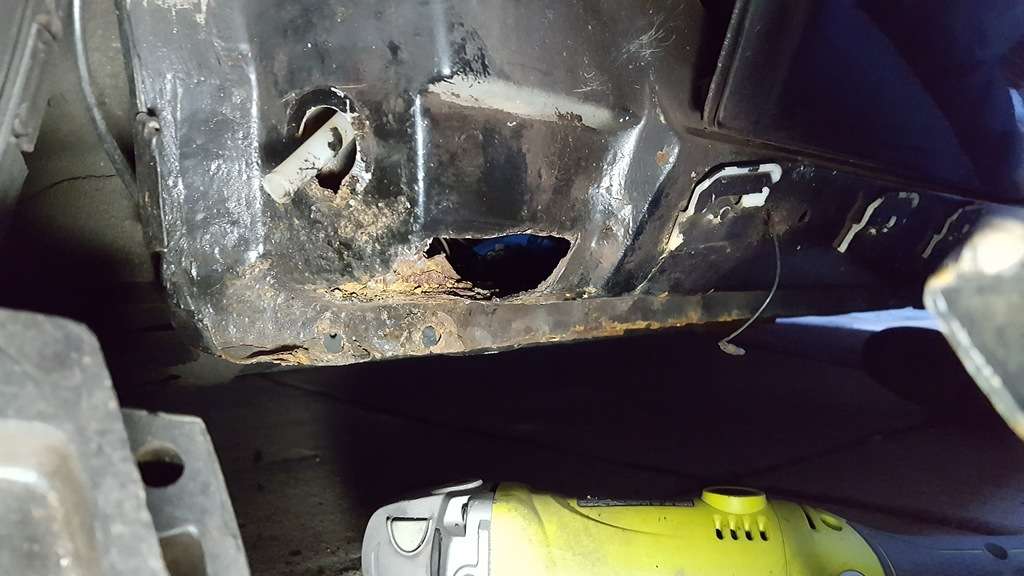
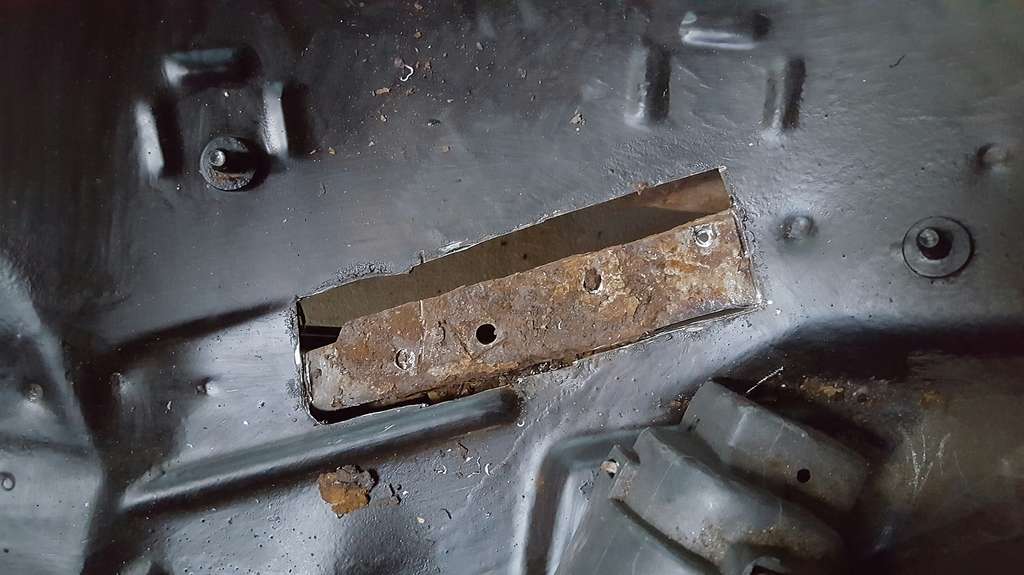
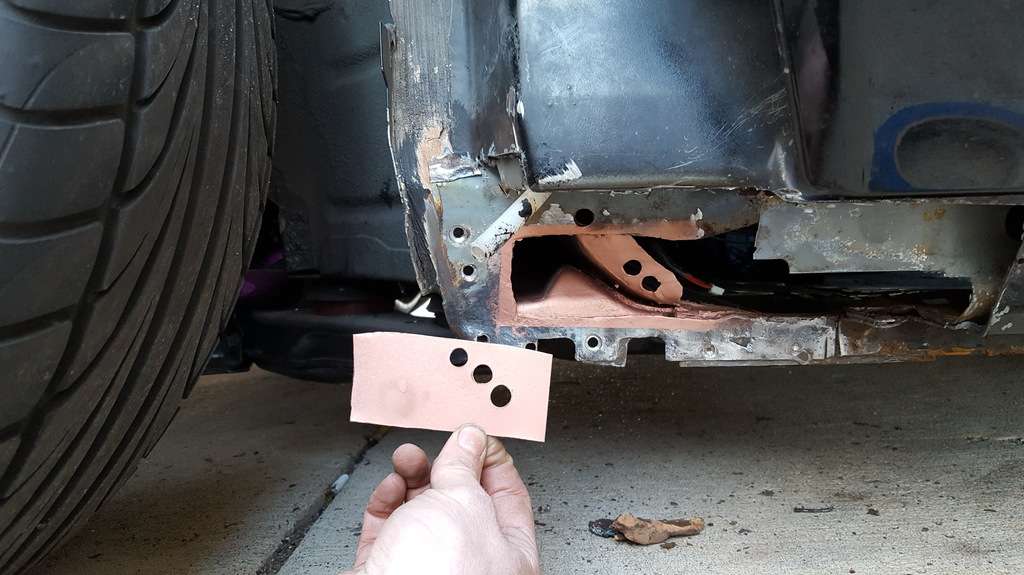
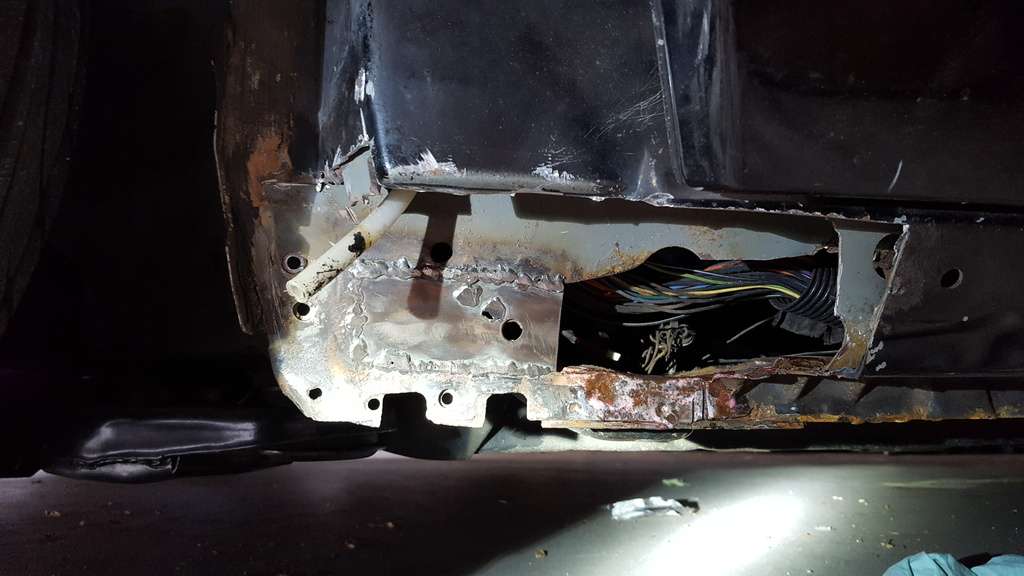
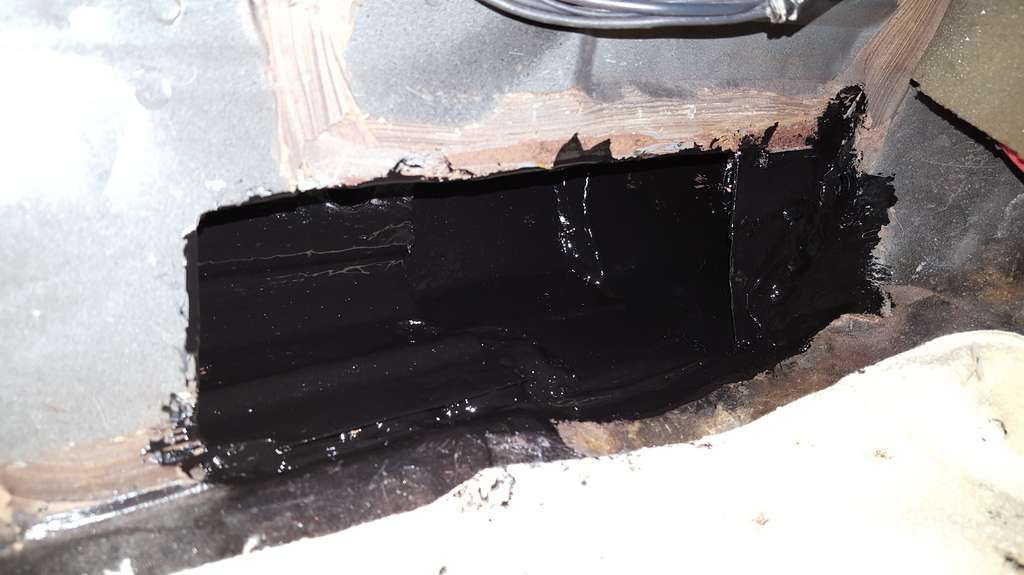
7 years or so ago when I parked the car and decided to go nuts in the engine bay, the water leaks from the front and rear glass seals turned my car into a fishbowl without me realizing. Water pooled on the floor and rear seat area for long enough to soak through the paint and cause it to bubble a bit in a few areas. I got around to stripping it down and painting it with rust proofer. Ended up with Zero Rust from Blue Lighting. Yesterday I did the driver's side up to the rear seat and today I did the rest. The good news is there's only one small area I didn't know about or remember that needs new sheet metal. It's about the size of a quarter on the driver's side rear seat pan. There's another spot in the driver's front rocker and the e-brake pass through that will require some new metal as well.
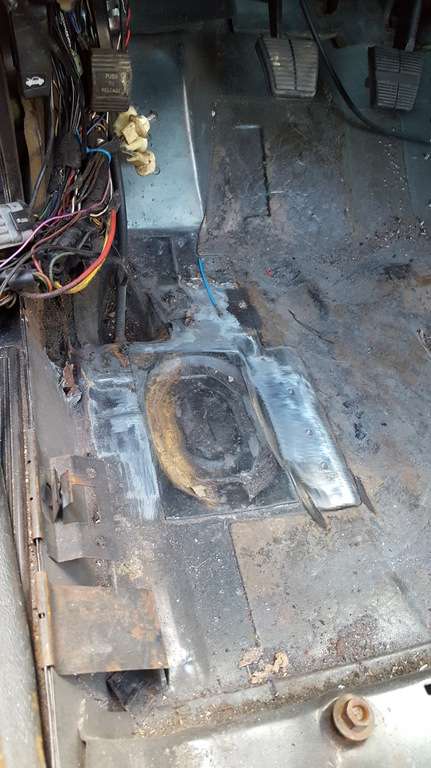

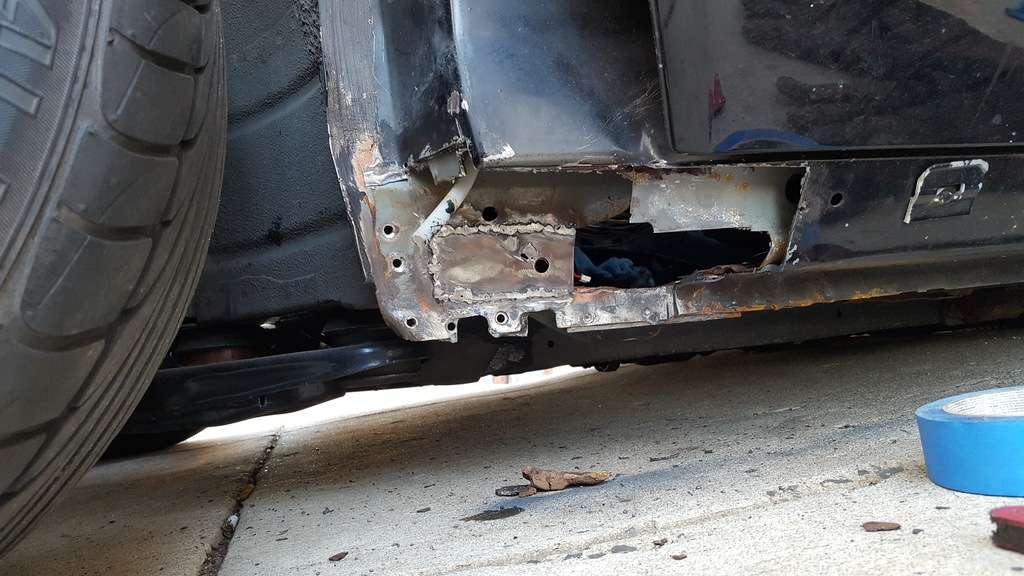
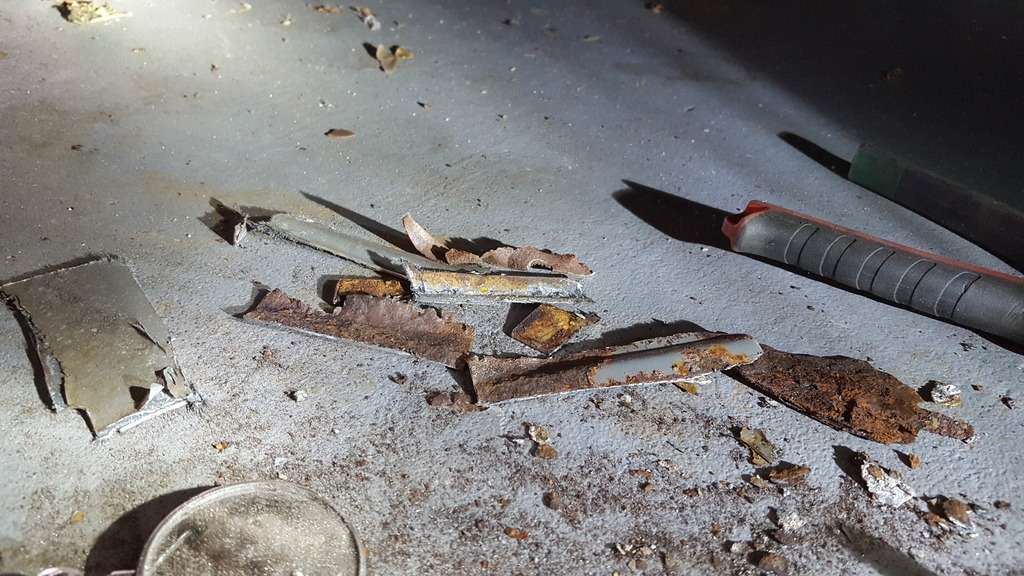
I started cutting some of the rot out to see how much work I have ahead of me. That small spot in the rear seat pan was a bit rougher underneath so I cut it out. I started to cut out the front corner and while not great, it's not as bad as I thought going aft.

I'lll have a bit more to cut out on the front but I ran out of daylight that day.. I made a couple templates to help make the sheet metal reconstruction a little easier.
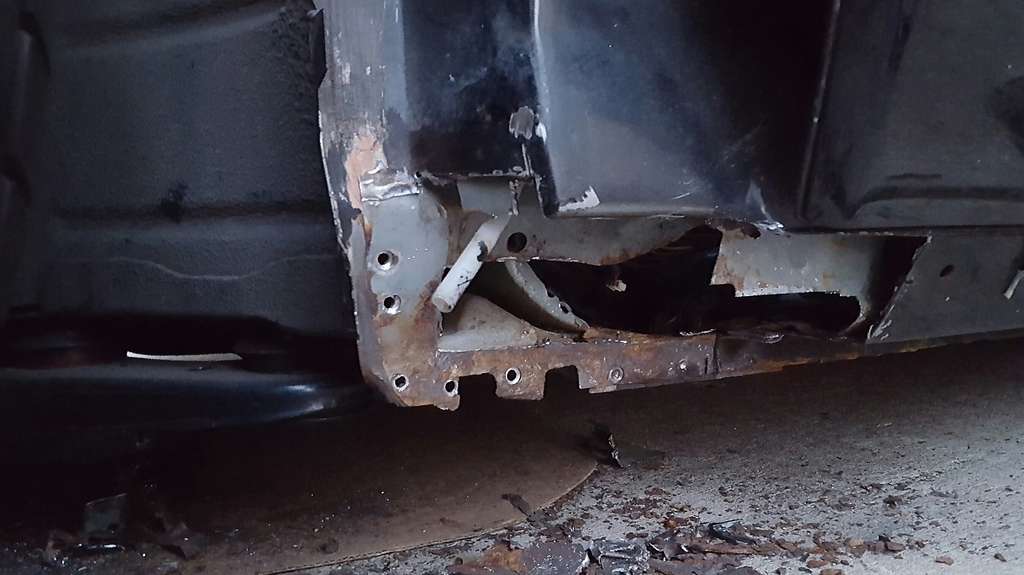
In that 3rd pic the bottom mounting portion of my fender is broken and mashed up. I'm not sure how/when I screwed that up but I'll plastic weld it back together at some point.
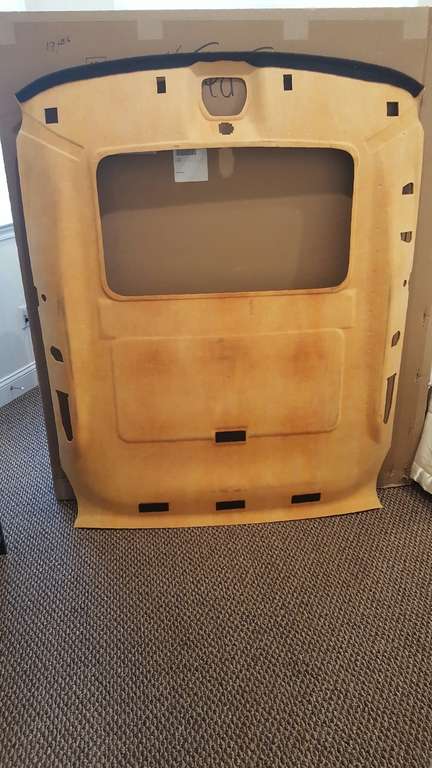
OEM headliner fiberboard is ordered.. money down, time up.
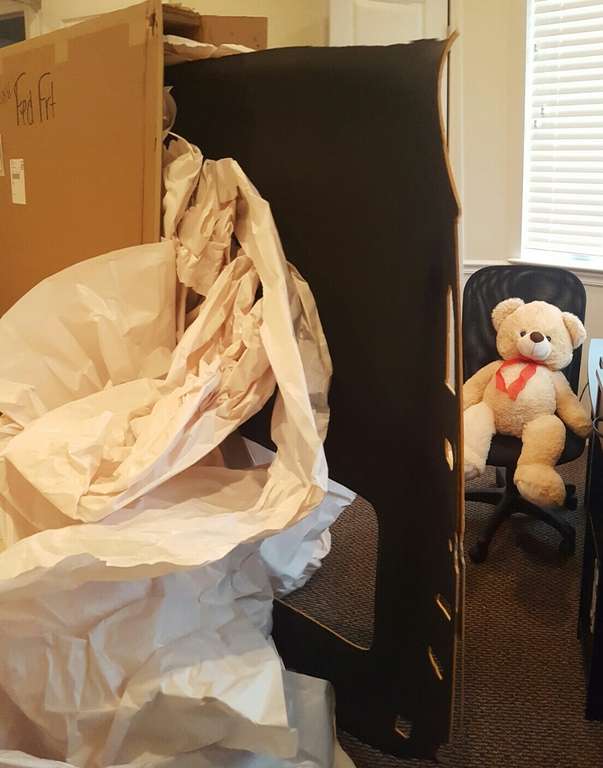
Virgin headliner arrived.. Ted approved
Some more NOS action. It needs a little cleanup from sitting in a bag for 18-25 years but it's one less thing to fix. The driver's side is no longer available.
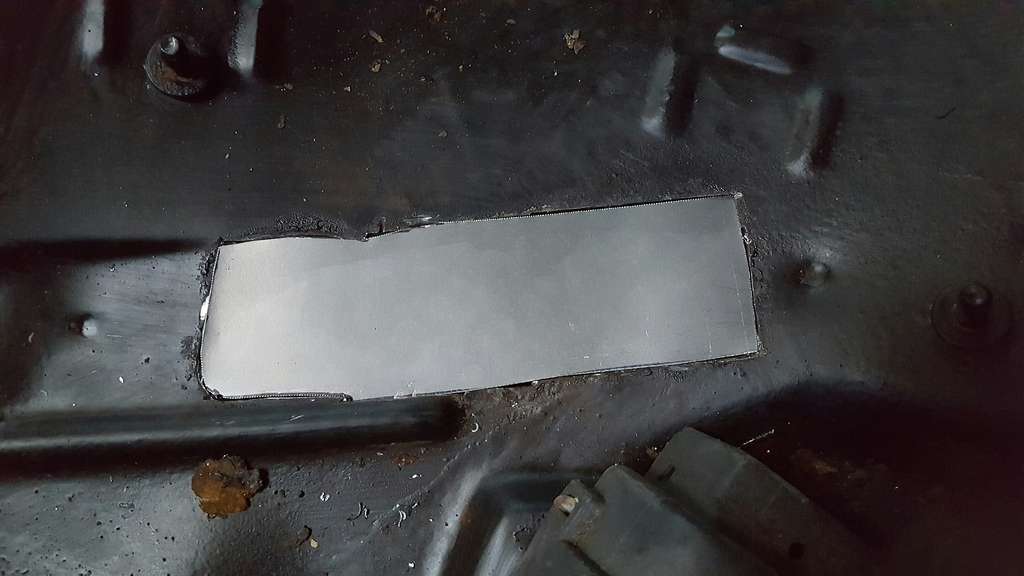
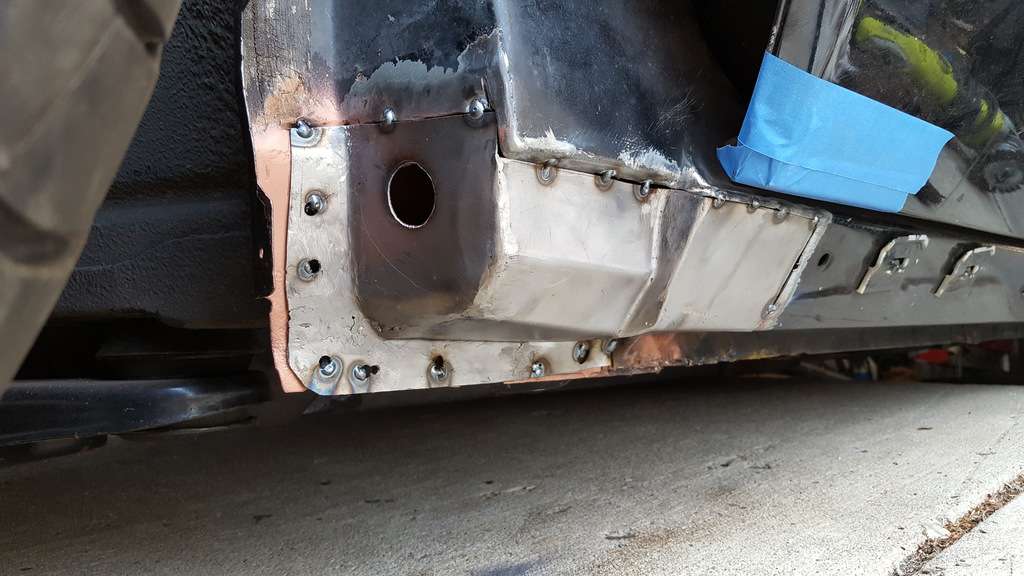
Starting to rough out some home made patch panels.. I really wanted to get that front rocker corner close to stock.

A little more..
More..
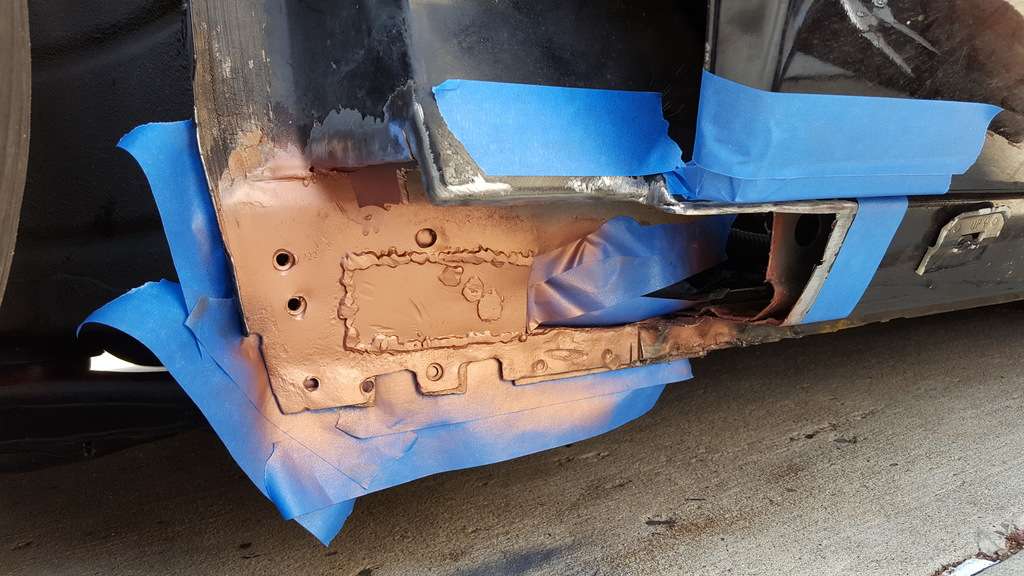
I did some final tweaks to the patch corner and started buttoning up the area for it to go on. I wanted to get the area forward of the sheet metal near the e-brake isolated from the rocker before I welded in the patch. That's what that small section is for. I'm keeping the rest open to the cabin until I paint and seal from the inside. My MIG wire ran out and I was cut a little short unfortunately..
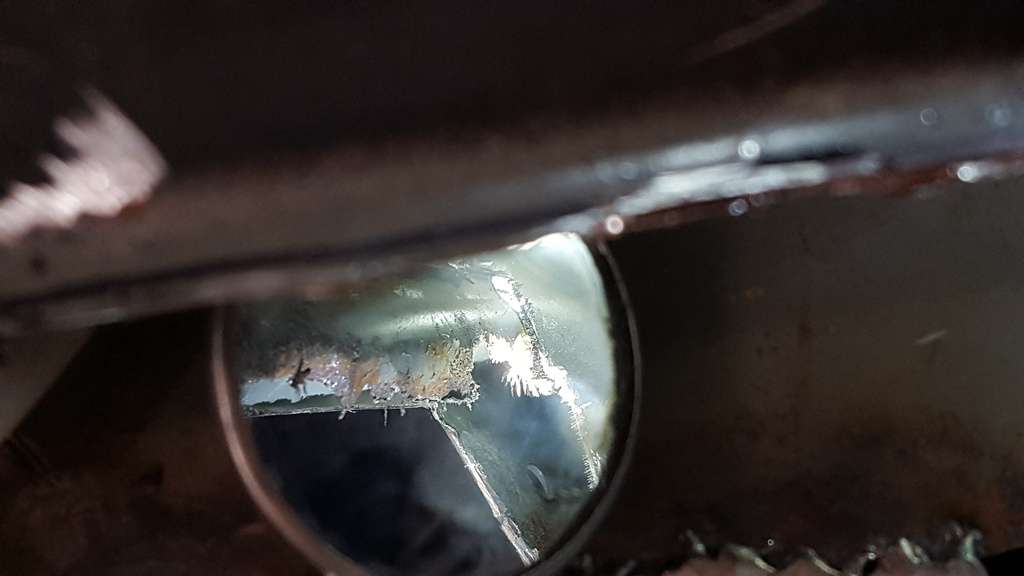
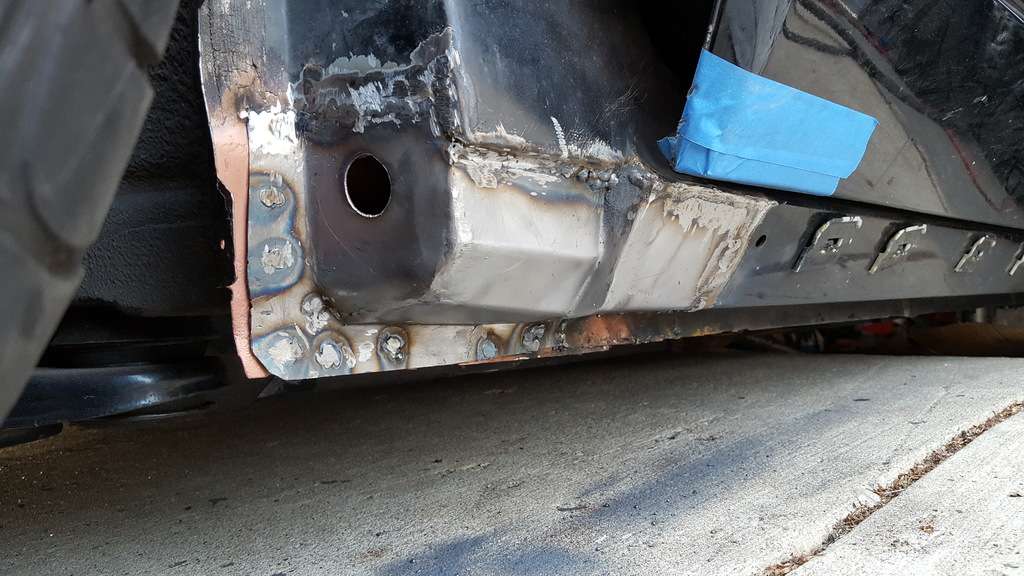
There was some more rust behind good metal that was bothering me. I wanted to get that out before it was all welded up. It as a PITA to get to without cutting out more exterior metal so I ended up using a dremel.
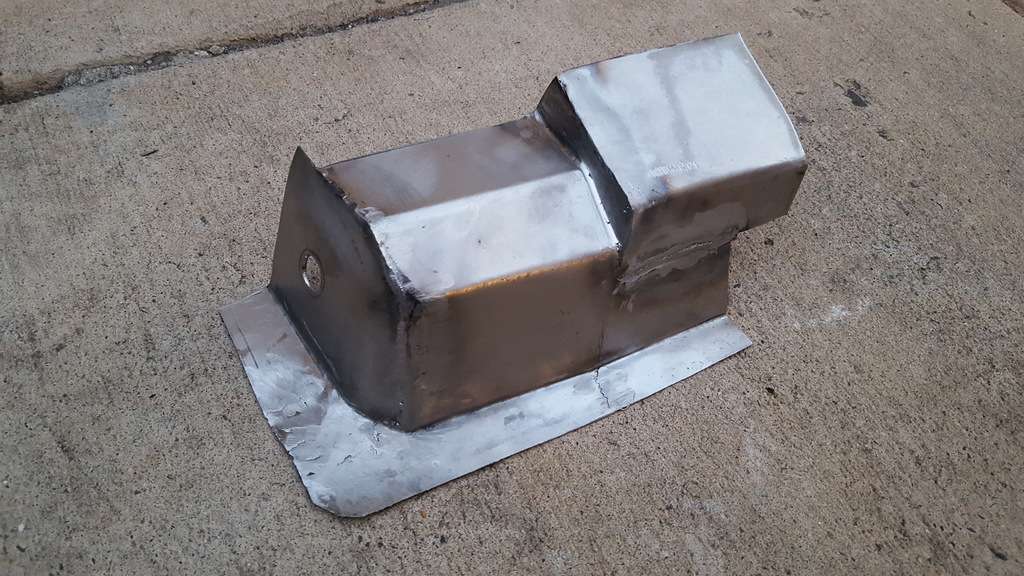
Aside from drilling some plug weld holes and some welding surface prep, the dog leg I made is ready to be welded on.
A little closer..
Here's when I first started poking at it
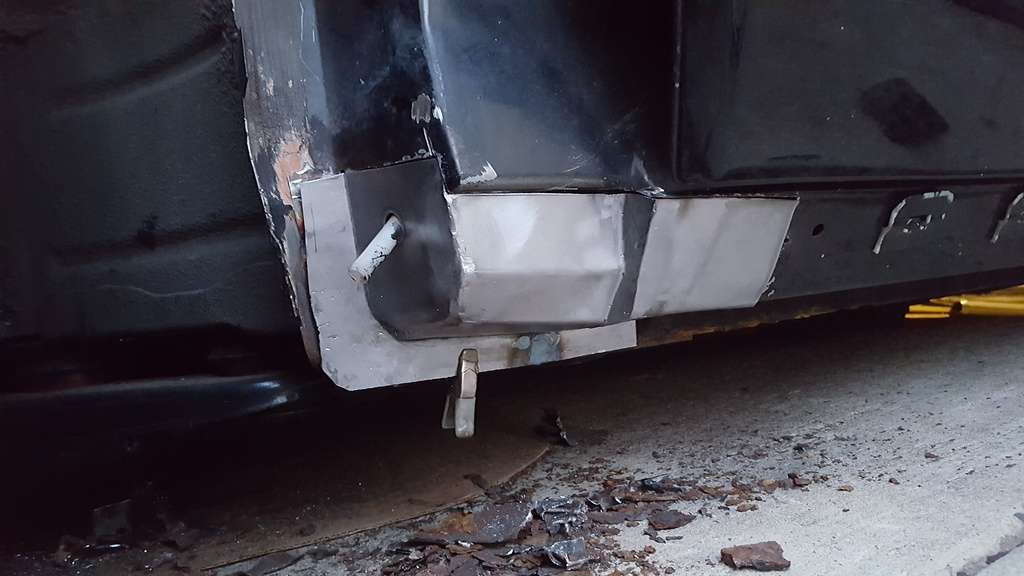
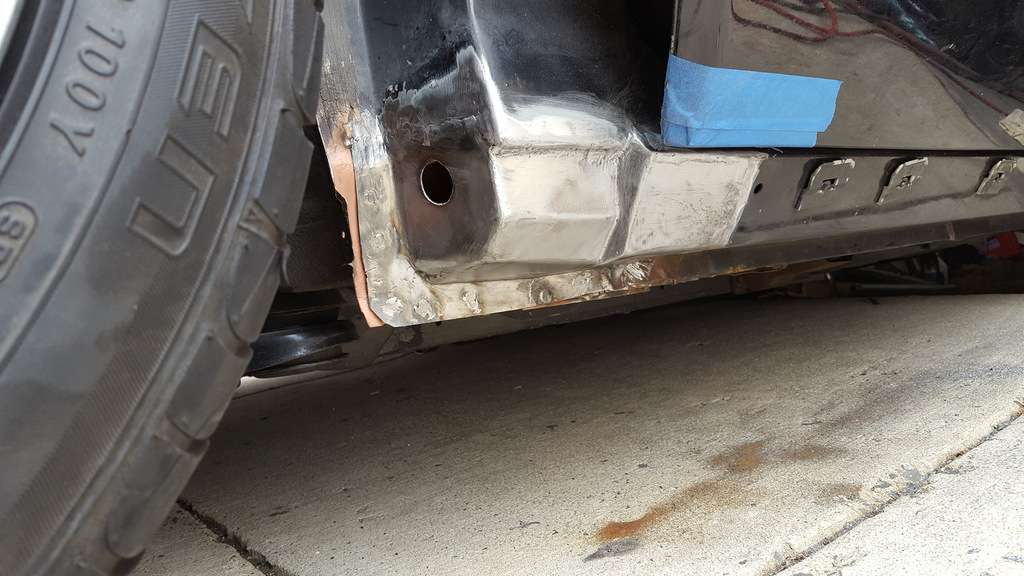
Still needs a little more grinder love, a little more welding, painting and seam sealing from the back..
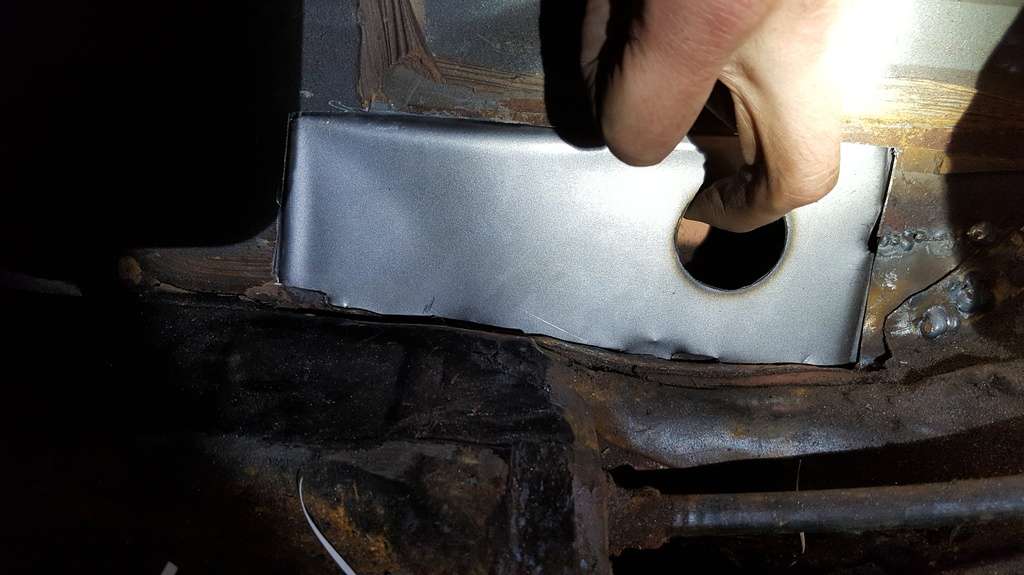
Aside from drilling a couple holes the outside part of the patch is done. At this point I still needed to do a second coat of paint inside the rail, tack in the interior patch panel and seam seal it up. I'm kind of glad I stopped the metal work where I did. I wanted to smooth it out more but if I did the thickness of the blue lightning paint (rust proof) would have hid it.
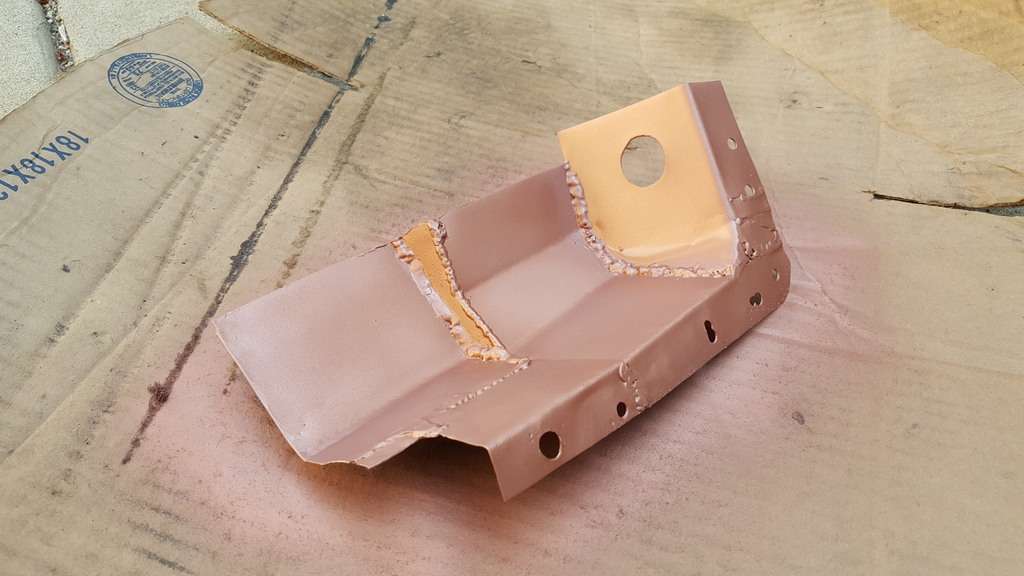
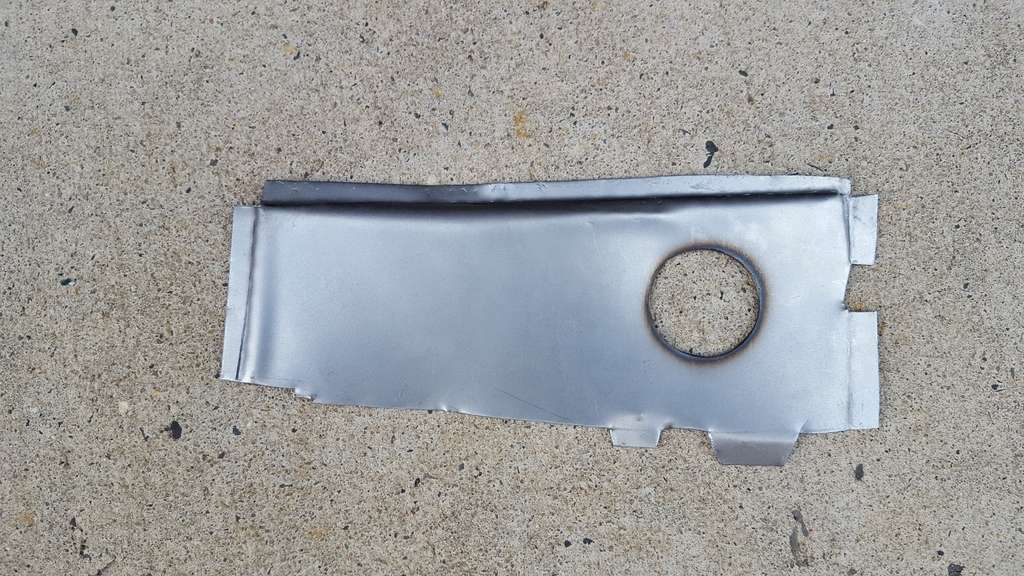
Inner patch panel with OEM style access hole.
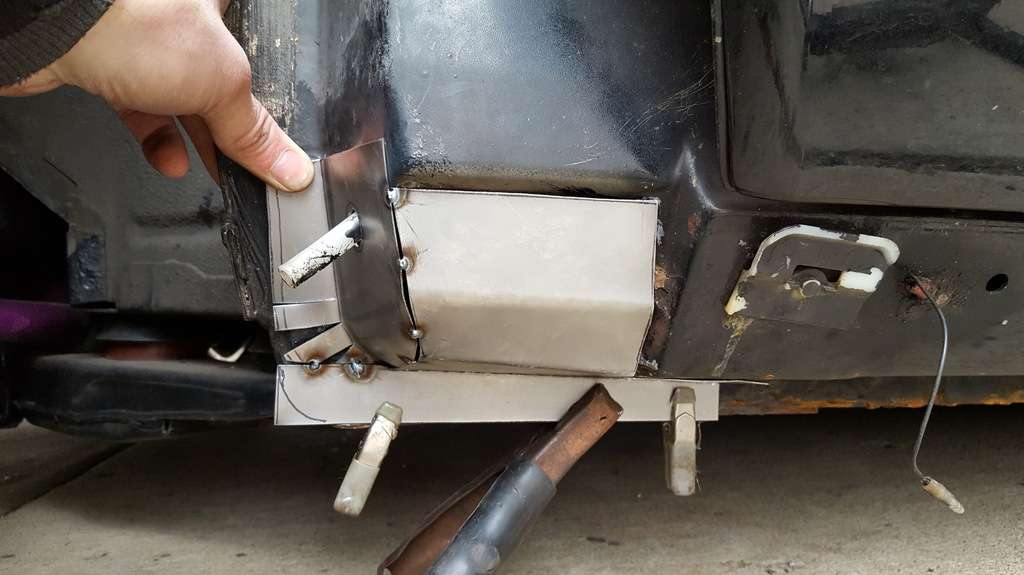
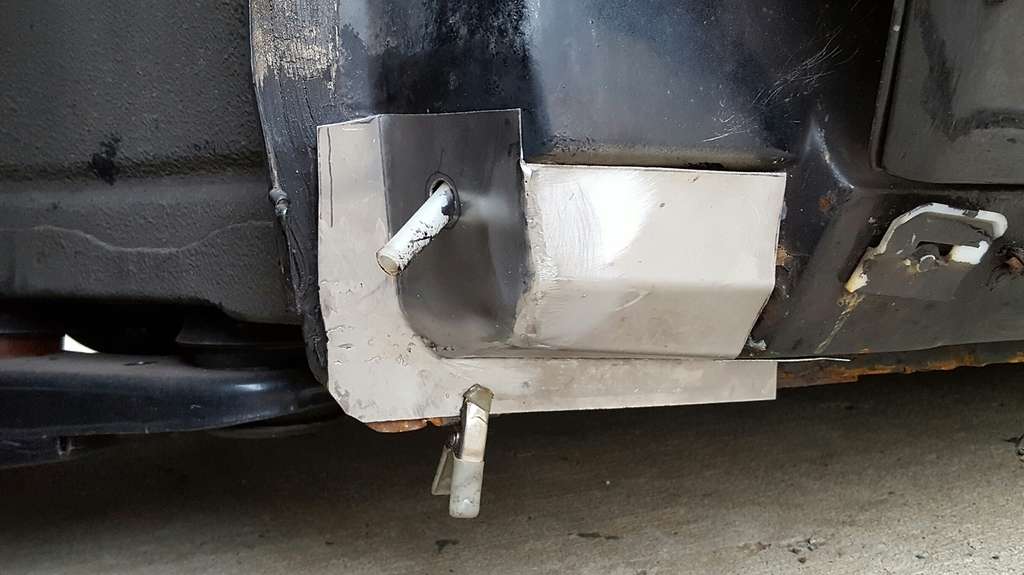
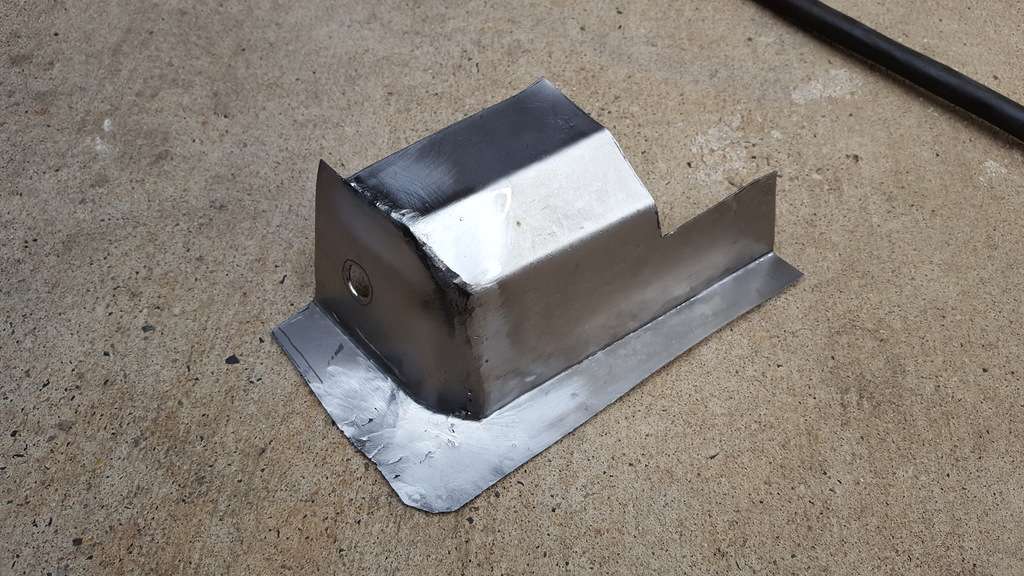
I switched gears and plumbed in the ELC pump and replaced the SE/SLE truck latch trim with SSEi trim. The trim has the inflator valve and on/off buttons. I picked that stuff up at the yard in Nov as mentioned in
this post.
It's super slow but it seems to be working as it should. I wasn't expecting much with a 25 year old pump and 1/8" line. The main driver for doing this is to make it easier to keep from scraping my exhaust parking in the garage.
https://youtu.be/YnuymDYh1LY
I still need to wire it in permanently. You can hear me using the power probe to test it. I'll run key-on +12v to it and ground both the pump and deflate solenoid through a rocker switch. Probably a heated seat switch. I'm pretty OCD so it'll probably take me a while till I'm happy with a permanent switch placement.
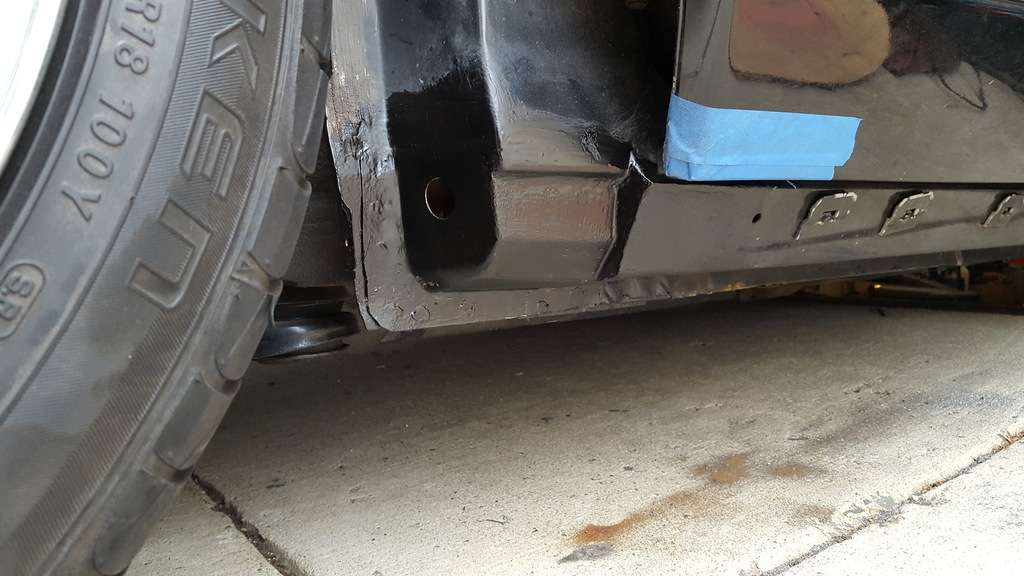
Got some more in. I ground down the area behind the pinched seam at the repair area and did 2 coats of Zero Rust. Forgot to take pics of that.. I saw some minor surface rust down the rocker so that got stripped down and 2 coats also.