There's a lot to learn... kids spend a semester on just the basics. You seem pretty eager to learn and you're taking the suggestions people are giving you so I guess we can continue to try and help. I also recommend reading your cameras manual at least once, maybe twice. Understand what every button is on your camera and how it works and if you're not sure then do some research to look it up.
You'll definitely want to move away from shooting in an auto mode, but before you can do that correctly you need to learn the basics so that you understand how to use your camera skillfully as a tool and be able to effectively produce the photos that you intend to.
I ended up just putting together a pretty lengthy intro guide to photography here. I typed some of the info myself and referenced wikipedia for some other that I couldn't figure how to word/explain clearly. There is a lot of good info here and will get you started, but there is still a lot to learn. Its a process... we're all still learning.
I have not gotten into how to make a good exposure (which can vary a lot by the shooting situation)... but its really late so that will have to be left for another time. If someone else want to step up and write something out for that then awesome, or if not I'll try to get around to it.
ISO
Film speed is the measure of a photographic film's sensitivity to light. Film with lower sensitivity (lower ISO/ASA speed) requires a longer exposure and is thus called a slow film, while stock with higher sensitivity (higher ISO/ASA speed) can shoot the same scene with a shorter exposure and is called a fast film.
The lower the film speed the less sensitive it is to light and the higher film speed the more sensitive it will be to light. The lower ISO you use the less 'noise' you will have as well which means the quality of the photo will be better. The higher film speed you use the more noise you will have and the quality of the photo will drop, but when you need to use a high ISO, you need to use a high ISO. Rule of thumb is to only use as high an ISO as is necessary... sometimes it is and thats fine, but when its not, go low.
(read more at:
http://en.wikipedia.org/wiki/Film_speed)
low iso/noise vs. high iso/noise
 Exposure (part 1)
The "correct" exposure for a photograph is determined by the sensitivity of the medium used. For photographic film, sensitivity is referred to as film speed and is measured on a scale published by the International Organization for Standardization (ISO). Faster film requires less exposure and has a higher ISO rating. Exposure is a combination of the length of time and the level of illumination received by the photosensitive material. Exposure time is controlled in a camera by shutter speed and the illumination level by the lens aperture. Slower shutter speeds (exposing the medium for a longer period of time) and greater lens apertures (admitting more light) produce greater exposures.
Ultimately, there is more than one correct exposure, as a scene can be exposed in many ways, depending on the desired effect a photographer wishes to convey.
(read more at
http://en.wikipedia.org/wiki/Exposure_(photography))
Shutter Speed
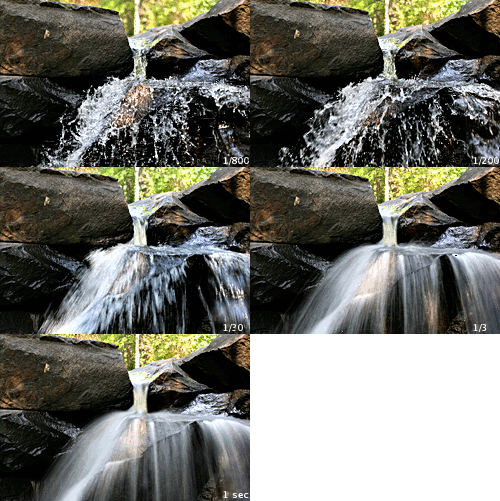
This is the length of your exposure. The shorter the exposure the less light allowed in. The longer exposure the more light it allows in. Shutter speed will also affect how much motion is stopped. A faster shutter speed will stop more motion and a slower shutter speed of a moving object may appear as a blur.
Also make sure that if you are shooting handheld that your shutter speed is fast enough that you don't cause any camera shake. Rough rule of thumb is your shutter speed should be 1/x where x = the focal length you are shooting at.
(read more at
http://en.wikipedia.org/wiki/Shutter_speed)
different shutter speeds
 Aperture
This is the intensity of your exposure. There is a diaphragm inside the lens which adjusts larger and smaller to let more or less light through. Think of a pinhole's worth of light vs a quarter size opening's worth of light. Also remember that f/22 is a small aperture (small opening), and f2.8 is a large aperture (large opening)... so the numbers seem backwards.
(Read more at:
http://en.wikipedia.org/wiki/Aperture)
Small vs. Large aperture

 Exposure (part 2): How Shutter Speed and Aperture work together to make the correct exposure
Factors that affect the total exposure of a photograph include the scene luminance, the aperture size (f-number), and the exposure time (shutter speed); photographers can trade off shutter speed and aperture by using units of stops. A stop up and down on each will halve or double the amount of light regulated by each; exposures of equal exposure value can be easily calculated and selected. For any given total exposure, or exposure value, a fast shutter speed requires a larger aperture (smaller f-number). Similarly, a slow shutter speed, a longer length of time, can be compensated by a smaller aperture (larger f-number).
Depth of Field
The portion of a scene that appears sharp in the image. Although a lens can precisely focus at only one distance, the decrease in sharpness is gradual on either side of the focused distance. A large depth of field would make everything in the photo in focus, no matter if its 2" away or 2 miles away... this is commonly used for landscapes. A small depth of field would mean that only the point that you focused on is sharp, and fades to a blur quickly. This is more commonly used for portraits or other situations where you want to isolate your subject.
You can achieve a large depth of field by using a smaller aperture, and you can achieve a smaller depth of field by using a larger aperture.
(read more at
http://en.wikipedia.org/wiki/Depth_of_field)
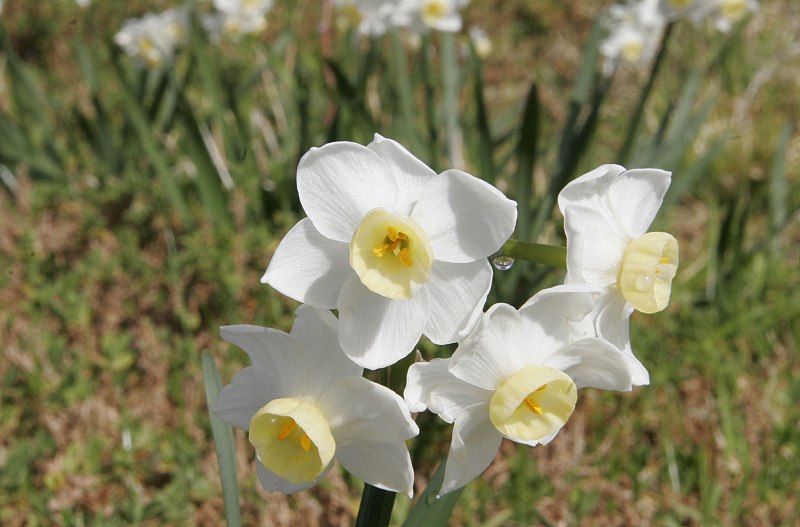
Shallow Depth of Field (DOF)

shot at f/32

shot at f/2.8
 White Balance
Different light sources have different colors of light that they emit. The human eye is very good at adjusting to this so most dont realize that a flourescent light has a green tint and a tungsten light has a amber tint, for example. The camera will pick up these tints unless you adjust for it, either in camera, or in post processing. Its a good idea to try and make this adjustment in camera before you shoot, and do any fine tuning in post processing later if needed.
In photography and image processing, color balance is the global adjustment of the intensities of the colors (typically red, green, and blue primary colors). An important goal of this adjustment is to render specific colors – particularly neutral colors – correctly; hence, the general method is sometimes called gray balance, neutral balance, or white balance. Color balance changes the overall mixture of colors in an image and is used for color correction; generalized versions of color balance are used to get colors other than neutrals to also appear correct or pleasing.
(read more at
http://en.wikipedia.org/wiki/White_balance)
RAW image files
A raw image file contains minimally processed data from the image sensor of a digital camera. Raw files are so named because they are not yet processed and ready to be used with an image editing program.
Because Raw files have minimal processing done in camera, they allow much more adjustment in post processing without as much image degradation. Basically, they are more forgiving in the cases where your exposure isn't quite right.
Raw image files are sometimes called digital negatives, as they fulfill the same role as film negatives in traditional chemical photography: that is, the negative is not directly usable as an image, but has all of the information needed to create an image.
(read more at
http://en.wikipedia.org/wiki/Raw_image_format)